How to use DeskTime as an employee?
Contents
1. Getting started - How to begin tracking your time.
2. What the stats mean - What all the tracked statistics represent.
3. Measuring productivity - How DeskTime measures productive time.
4. Adding time manually - How to add offline activities to your timeline.
5. 'Clocking out' and Privacy - Managing time when your computer is tracked.
6. Tracking projects - How to track projects and tasks using DeskTime.
7. Adding project time manually - How to enter project time into your timeline.
8. Using the Work schedules calendar - Seeing your appointed shifts and placing requests.
9. Using the Absence calendar - Seeing your planned absences and placing requests.
10. Integrating Google/Outlook calendars - How to add calendar events to your timeline.
11. Automatic break timer - How to enable reminders to take a break from work.
1. Getting started
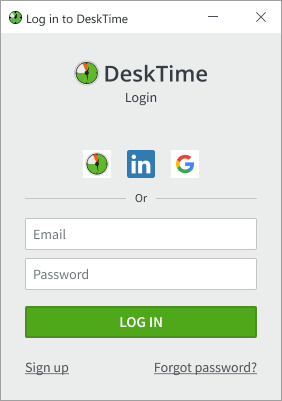
An email invite will be sent to you by an admin. There you will find your DeskTime Username and Password. You will also need to Download the DeskTime app - it is not possible to track time without it! Open the download file, install the app and log in to it.
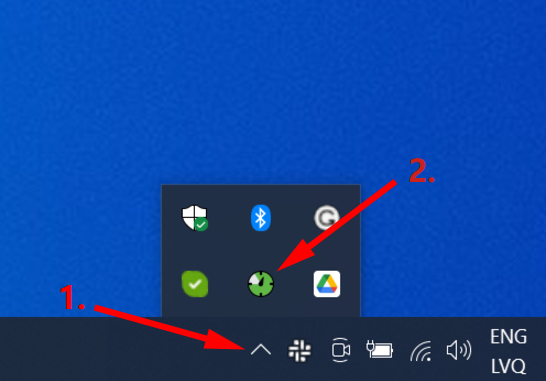
Now you should see a DeskTime icon on your taskbar. Clicking on it will take you to your DeskTime stats. You can right click on the app icon for more options as well.
For detailed video of the set up, please check here.
2. What the stats mean
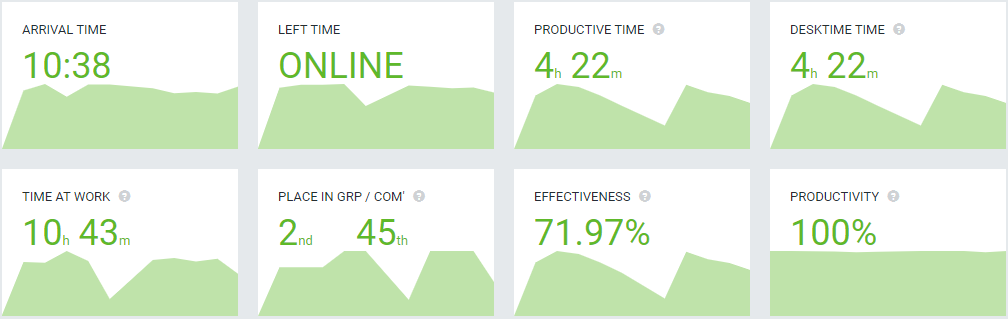
- Arrival time - the first time you tracked any time that day.
- Left time - the last time you tracked any time that day.
- DeskTime time - Time spent on your computer + any manually entered time.
- Productive time - Total time spent on productive apps.
- Time at work - Total time from when you arrived and logged in to when you last tracked time.
- Idle time - Any time periods when you have been away from the computer or inactive.
- Offline time - Manually entered time on your timeline.
- Private time - Time used for personal needs. Read more about Private time here.
- Effectiveness - Productive time divided by Minimum hours for the day, expressed as a percentage.
- Productivity - Percentage of how much time at the computer has been spent on productive apps.
3. Measuring Productivity
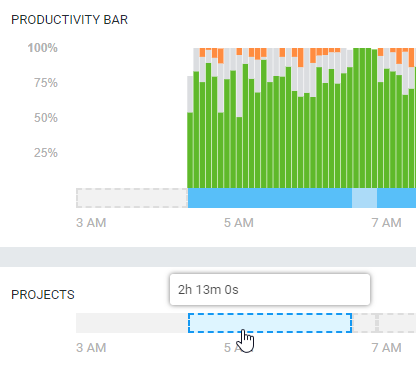
 The 'Productivity bar' shows a breakdown of your day. All of the tracked applications will appear here, with the colors representing their productivity level. The gaps in the timeline signify 'Idle time' - periods when you have been away from the computer, or have been inactive on the computer for more than 3 minutes (this period could be longer, if changed by admins)
Which applications are marked productive and which ones are not is managed by admins on the DeskTime account.
4. Adding time manually
If you need to log a work-related activity on the timeline manually, click on an idle time period, enter a description for the period and select a productivity level, then save. Depending on the account settings, an admin might need to approve the request before it is added to your hours.
5. 'Clocking out' and Privacy
After logging in to the time clock app your first time, DeskTime will start with your computer and track time in the background. If you want the application to stop tracking your activities, there are two options to do that.
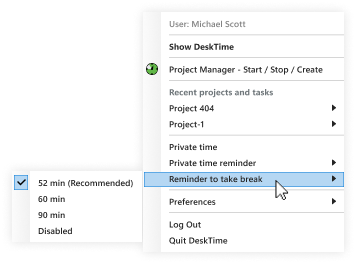
Private time - to temporarily stop tracking, right click on the DeskTime icon on your taskbar and click 'Private time'. While it is active, all tracking will be stopped until you turn Private time back off by clicking the option again. The icon will be gray during this time, reminding you that Private time is enabled.
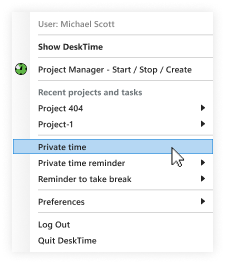
Logging out - to stop tracking permanently, use the 'Logout' or 'Quit DeskTime' options. The app will not track any time while turned off or if you are not logged in. To Clock in, turn on the app or log back in to it and tracking will resume.
6. Tracking projects
In the Projects section you can see all the projects created on the DeskTime account, as well as tasks under them, if you open a particular project. You can track time to a project with the DeskTime project tracker.
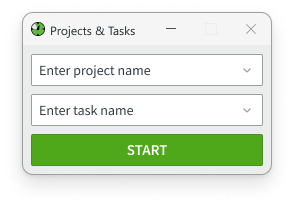
Find it by right-clicking the DeskTime icon on your taskbar and clicking the 'Create a project/search for a project' option. This will open the timer. Here you can choose a project from the list, as well as a task under it. Once you start the timer, all activities will be logged on this project, until you turn the timer off or switch over to a different project. Recently tracked projects will also appear on the app icon menu, allowing you to swap between projects easily.
7. Adding project time manually
In My DeskTime you will find the Projects bar, with empty spaces under all tracked time. Clicking one of these will allow you to assign time to a project and task. You can also edit the time in the window to apply the project to a larger time period.
8. Using the Work schedules calendar
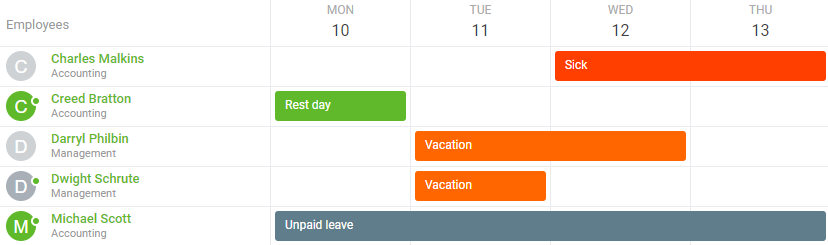
In the Work schedules section you can see Shifts assigned to you, as well as those of your teammates. The icon next to the shift also represents if the person is going to work from the office or remotely that day, with the house icon representing the latter.
 If your company does not have set working hours, you can use this section to request shift times for yourself. To do so, click on the 'Add schedule' button, or on any empty date in the calendar in your line. This will open a shift creation window.
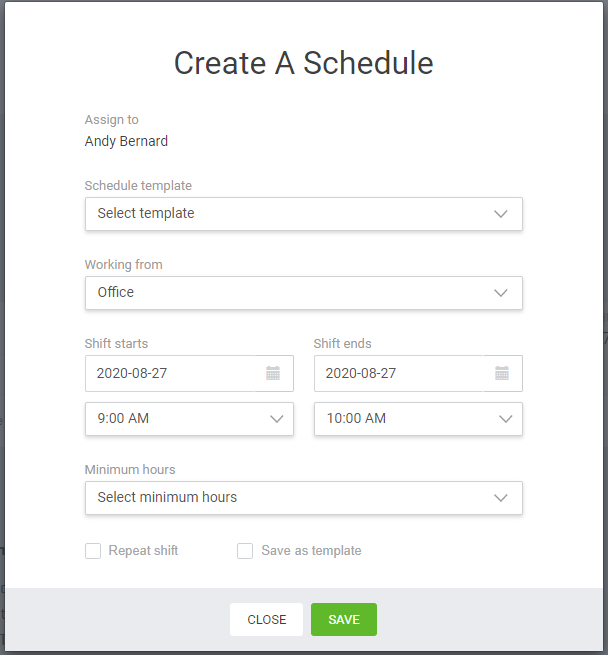
Here you can mark if you will work in the office or remotely, what time will you start and end, as well as how many hours you will be working. After clicking 'Save', a request will be created - your managers will see a notification and approve or decline the shift later on.
9. Using the Absence calendar
Similarly, in the Absence calendar you can view the planned absences of you and your colleagues, be they Vacations, Rest days, Business trips or Sick days.
You can use the calendar to place requests for your own absences as well, such as vacation times. To do so, click on the 'Add away time' button, or on any empty date in the calendar in your line. This will open a shift creation window. From there, select an absence type and the dates to request it for and click on 'Save'.
This will create a pending absence, which will later on be approved or declined by one of your managers.
10. Integrating Google/Outlook calendars
To help manage your timeline, you can integrate your Google or Outlook calendar to your DeskTime account. To do so, head over to the Integrations section and use the 'Activate' button on the respective calendar.
Once you integrate a calendar, DeskTime will take note of the events entered in the calendar. If you are not tracking time during the event, afterwards the event will be marked on your timeline as productive time and given the details of the event as 'Calendar time'.
11. Automatic break timer
DeskTime has an option to turn on a reminder to take breaks. Find it by right-clicking the app icon on your taskbar and looking under 'Reminder to take a break'. You will receive a notification to take a break when you have worked for the selected time period without a pause.