Top things to do after creating your account
If you have created your DeskTime account and invited your team members to join, and made sure that everyone has installed the DeskTime application, it is time to set up your account to match your tracking needs.
Here you will find the most important things to do and learn to get the most out of DeskTime's possibilities in tracking.
1. Organize employees into teams
On DeskTime, you can group employees into teams, such as Marketing, Management, etc. In order to create an Employee team, go to Settings → Teams, and click on the 'Add new team' button. Once a team has been created, you can edit its settings by clicking on the three dots and choosing 'Edit'.
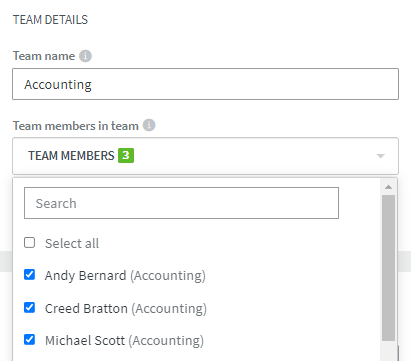
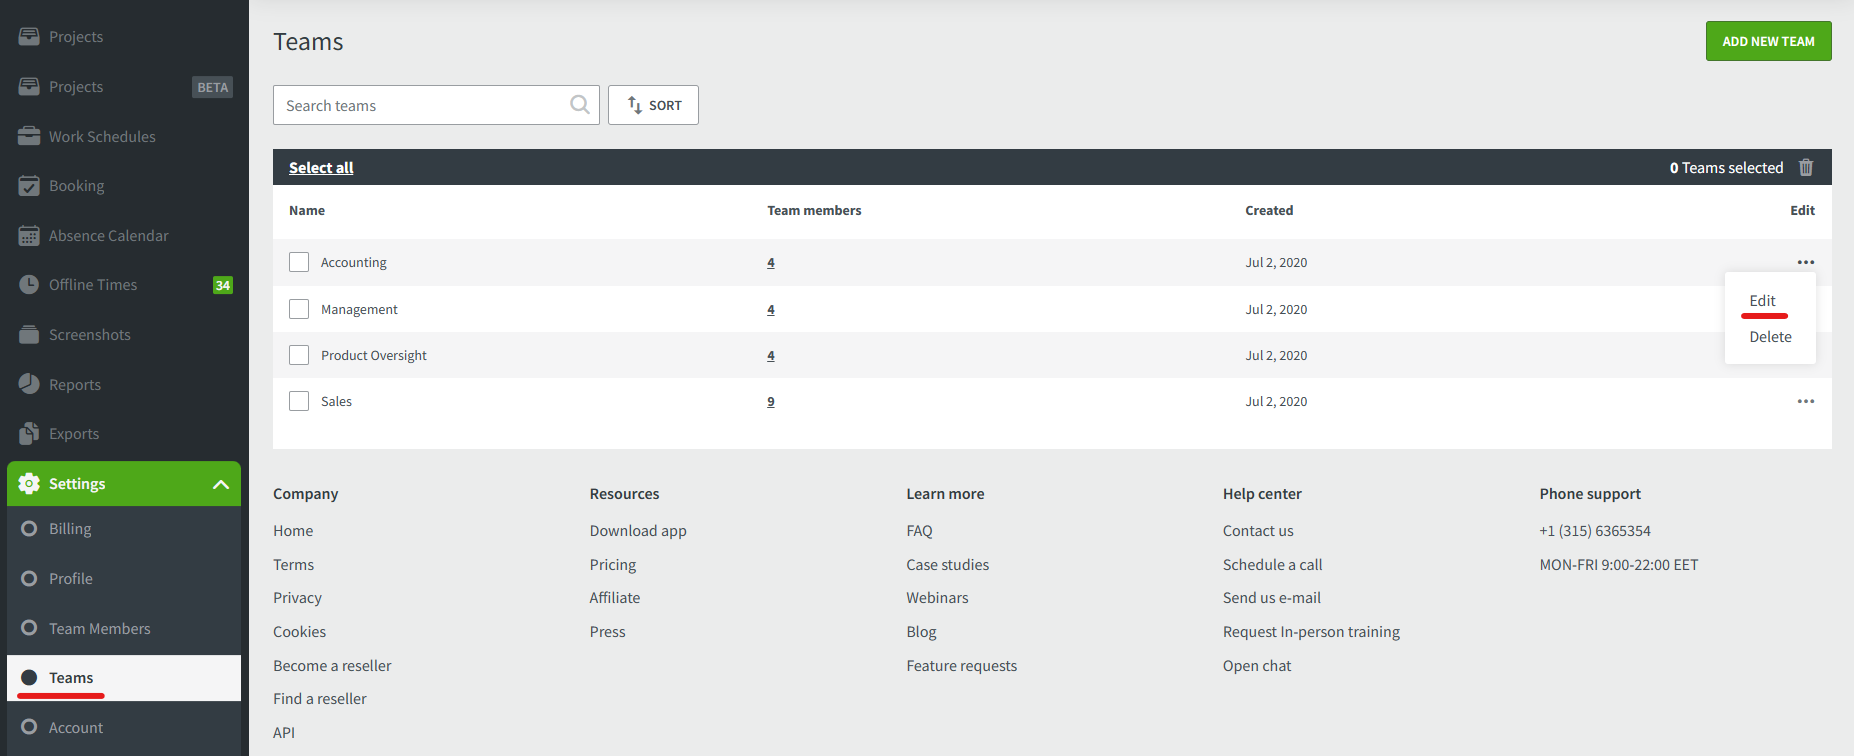 From this menu, you can add employees to the team and edit all settings separately for members of this team.
2. Set up working and tracking times
Most settings in DeskTime can be changed on any level - for the entire account, for a team, or a single employee.
The most important thing to set up at the beginning is Working days - which days and times should DeskTime expect your employees to be at work. The Minimum hours setting notes how many hours you expect your employees to be at their computers every day.
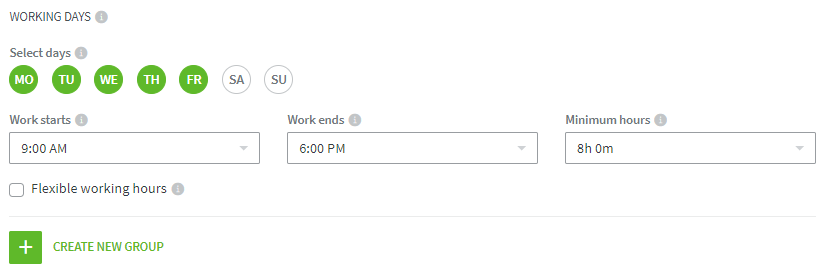 In the Tracking days section, you can mark what days and times DeskTime will track details from your employees. By default, Saturdays and Sundays will not be enabled, so turn those on if your employees may work on weekends.
![]()
3. Optional - enable screenshots
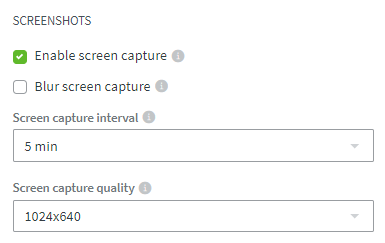
To use the Screenshots feature, you will need to mark 'Enable screen capture' in settings. Here you can also choose to blur the screenshots and set the time interval between them. Taken images will be visible in the Screenshots section by admins.
To find some insights on how to best use screenshots, read our blog post about them here.
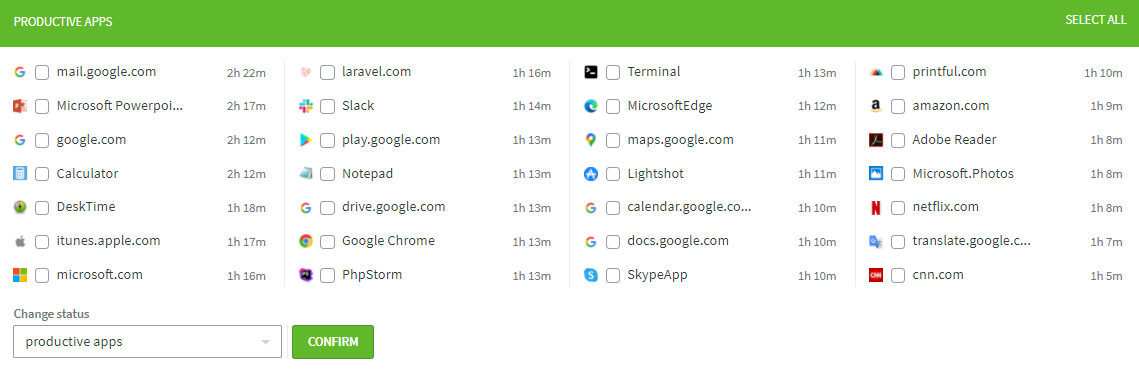
4. Set up app productivity levels
Once some time has been tracked, all visited websites and applications will appear in the Apps Productivity section of settings. From here, you can organize them into productivity levels - Productive, Neutral, and Unproductive.
To do so, mark any applications you wish to move to a different section and choose the productivity level from the drop-down list below. After confirming, these apps will be moved after a short while.
You can also open a team at the top of the list to specifically change productivity levels for this team.
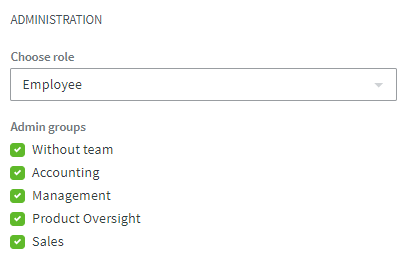
5. Assign admin rights to team leads
To make an employee an admin, go to Settings → Team members and Edit the user you wish to change. In the Administration section, you can choose a role for the employee and assign teams for them if you make the employee a User admin or User manager.
To see the differences between user roles, read this article.
6. Enable automatic reports
Daily, weekly, or monthly email reports can be enabled for the account owner or admins. To do that, go to Settings → Team members and edit the respective employee.
7. Integrate your calendar into DeskTime
To help manage your timeline, you can integrate your Google or Outlook calendar into your DeskTime account. To do so, head over to the Integrations section and use the 'Activate' button on the respective calendar.
Once you integrate a calendar, DeskTime will take note of the events entered in the calendar. If you are not tracking time during the event, afterward, the event will be marked on your timeline as productive time and given the event's details as 'Calendar time'.
8. Explore the Team members section
As an admin, the Team members section will give you live information about what your employees are working on. On the list, you can see attendance details - what time each employee arrived today, what time they left, and how much time they have spent working.
Most importantly, you can see what application each employee is working on and what project they are tracking if any. The list will keep itself refreshed, so you can always know what is going on for the day.

9. Explore the Reports section
Once your employees have tracked data, you can look at the results in the Reports section. Here you will see everyone's productivity, tracked hours, as well as who was late, absent, or logged any time manually. Learning how to filter and navigate the Reports section will let you see how your company is performing.
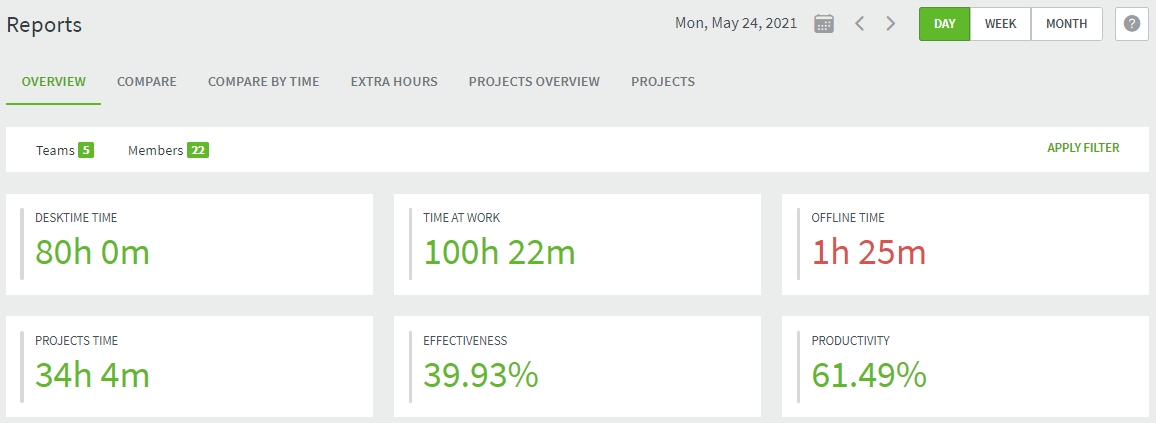 At the top right side, you can change the time period for the data to a week or a month and navigate to different periods with the arrow buttons. The 'Teams' and 'Members' lists will allow you to filter out specific employees or teams to be shown in the reports.
There are 6 types of reports available:
- Overview - shows you attendance and productivity of employees
- Compare - allows you to compare teams or employees for their results
- Compare by time - allows you to compare a team's or an employee's results in different time periods
- Extra hours - shows you which employees come in early and stay late at work
- Projects overview - shows what projects are being tracked and hours spent on them
- Projects - allows you to filter out specific projects to see employee stats on them
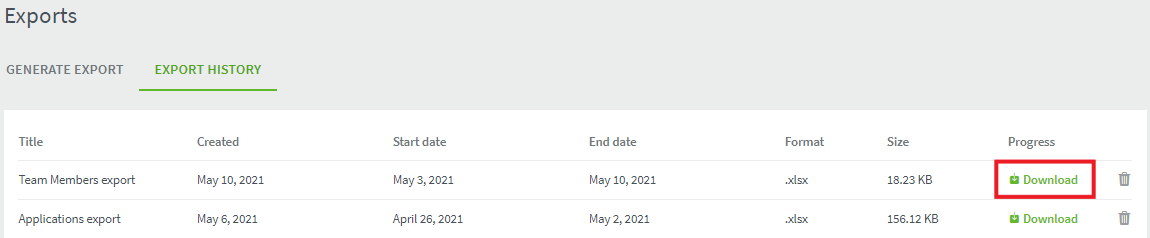
10. Create data exports
To see in-depth reports with all of the tracked data, you will need to go to the Exports section. Here you can choose one of the 11 available export types by clicking on any of them. Once you have reached the creation page, follow these steps:
- Optionally, enter a title for your export
- Select a time period from the preset periods or by using the calendar.
- Select which team members/employees to take data from
- Select how to group the data - by days, weeks, or months
- Choose to either export the data as an Excel or a CSV file
- Click on 'Create export'
When you are done, you will be taken to the 'Export history' section, where your newly generated export will be prepared. It might take a while if your export contains a large amount of data. Once it is done, you can download it using the 'Download' button.
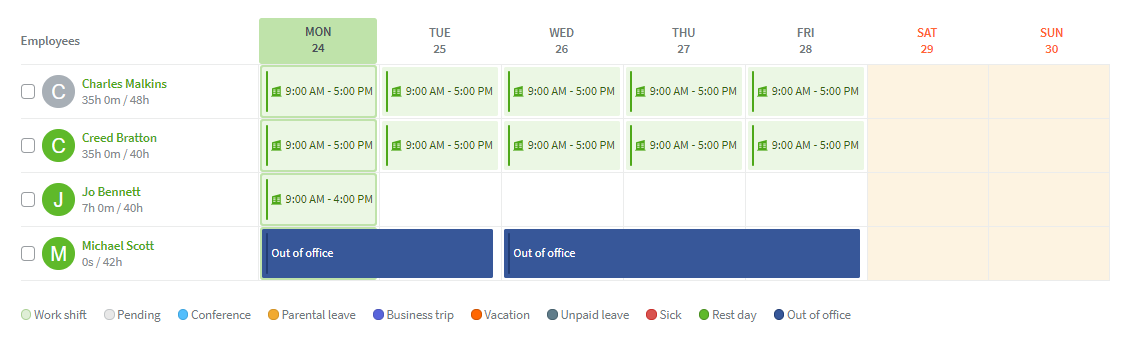
11. Set up employee schedules
In the Work schedules section, you can assign specific working hours for your employees in the form of shifts. With this feature, you can assign night shifts and multiple shifts a day, as well as specify if your employee is going to work from home or in the office.
To assign a shift to an employee, press the 'Add schedule' button. This will open the shift creation menu:
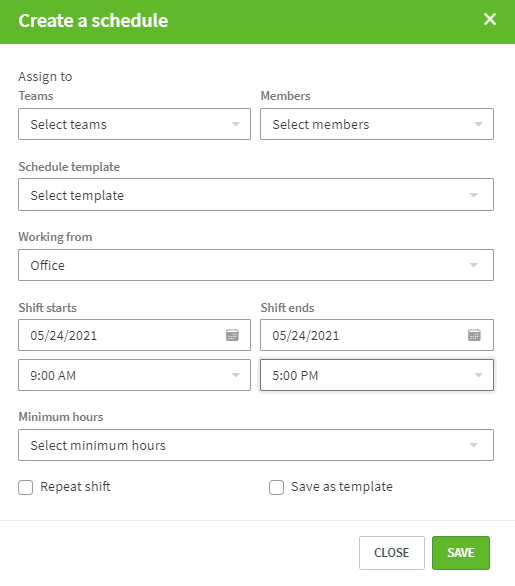
From here select the employees or teams you wish to apply the shift to, as well as to mark if the employees will be in the office or working remotely. After that, mark the date and starting and end times of the shift, including the minimum hours your employees need to work.
If you wish to copy the shift to multiple days, use the 'Repeat shift' option. There mark which days to compy the shift to and until which date should the shift be copied in the calendar.
After clicking 'Save', the shifts will be applied for your employees. For a deeper dive into all of the features of the Work schedules section, check out the FAQ section here.
12. Set up employee absences
Similarly, in the Absence calendar, you can set planned absences of your employees, such as Vacations, Rest days, Business trips, or Sick days.

To create an absence in the calendar, click on the 'Add away time' button. This will open a new window. From there, select which employees to apply for the absence. Then choose an absence type and choose the dates to use this absence for. Lastly, click on "Save".
On days with an absence, your employees will not be counted as missing or late, as well as their teammates will be able to see when their colleagues are going to be absent in the calendar.