How to track time with the desktop app for Windows?
After you've successfully downloaded and installed the app and logged into your account, you can start tracking project time. Follow these steps to do that.
Find the desktop app
You'll see the DeskTime icon in your taskbar. In some cases, the icon may be under the hidden icons. If so, press on the "hidden icons" option and move it out to the taskbar to be able to see it at all times.

Read more about what does each desktop icon means.
Open Project Manager and start tracking
If you want to start tracking project time, right-click on the DeskTime icon in your taskbar and select Project Manager - Start / Stop / Create. The Project Manager will pop up, and you can choose your project or create a new one.
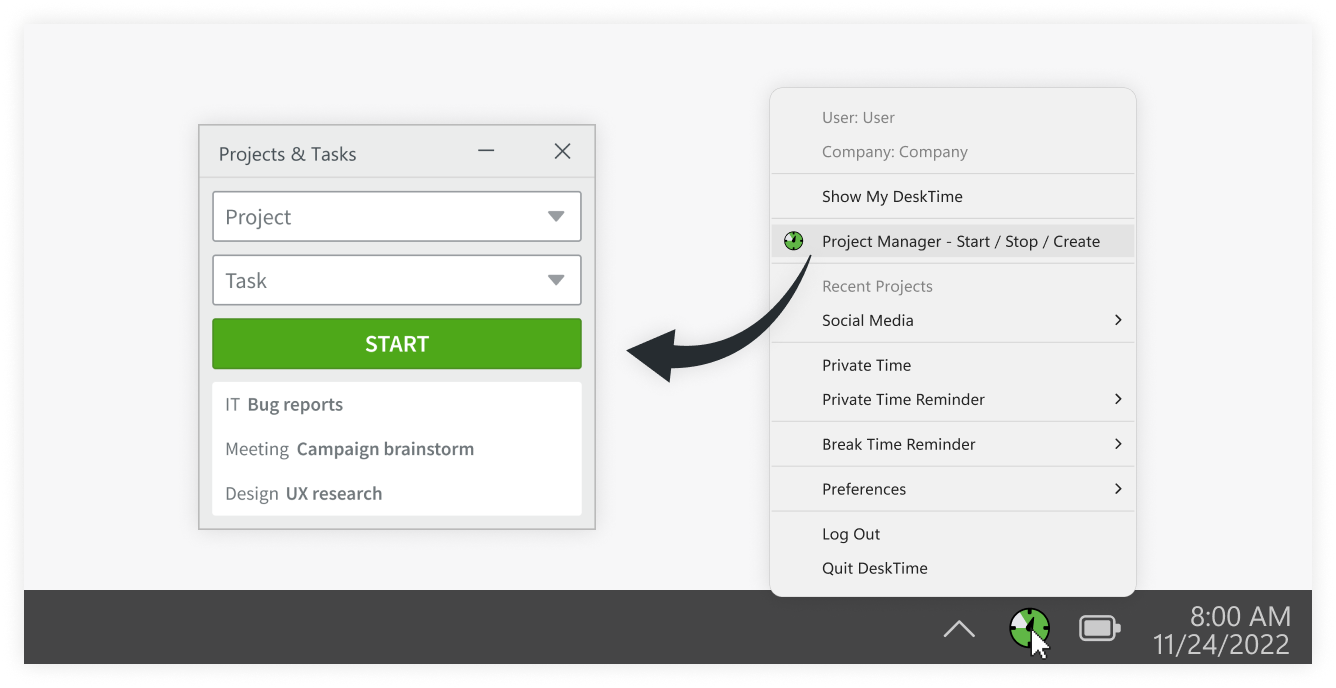
Find recent projects and tasks
You can also access the projects you've been recently working on under the Recent Projects section and start tracking time from there.

FYI – Start tracking time automatically
If you want to track time automatically, you can set up DeskTime to start tracking the moment you turn on the computer.
Right-click on the DeskTime icon, go to Preferences, and click on Launch on System Startup.
Note that in this case the tracked time won't be assigned to a particular project/task unless you left a project open when you turned off the computer. You can later add the time to a project/task manually.
