Basecamp tips and tricks for beginner users: From basic how-tos to focus-boosting hacks

It’s time for Basecamp tips and tricks!
Basecamp is a project management tool that simplifies project journeys, especially for small and medium-sized teams. Its history dates back to 1999, when a design company run by Jason Fried (the CEO of Basecamp to this day) needed a tool to help them manage the growing number of projects.
After trying out what was available, the team decided to build their own solution. It caught the attention of the company’s clients as an efficient way of managing projects, and the company saw a business opportunity, made Basecamp available for others, and the rest is history.
If you’re looking for a user-friendly tool for small project teams, Basecamp is the way to go. In this article, we’ve selected several Basecamp tips and tricks for those just starting with the tool. So, if you’re here to learn some basic hacks on how to use Basecamp for project management – keep reading!
Want to get the most out of your time?
Try DeskTime for free!
Try free for 14 days · No credit card required.
By signing up, you agree to our terms and privacy policy.

Basic tips on how to use Basecamp
As this guide is aimed at beginners, we’ll start with super simple tips on how to use Basecamp – because all the other hacks don’t matter if you have no clue how to use the tool, right?
Set up your first project
After you’ve logged into Basecamp and are ready to use the tool, it’s time to set up your first project. Projects are the essence of how Basecamp is structured – it is, after all, a project management tool.
On your Home page, projects look like pinned notes, making it relatively easy for you to navigate them.
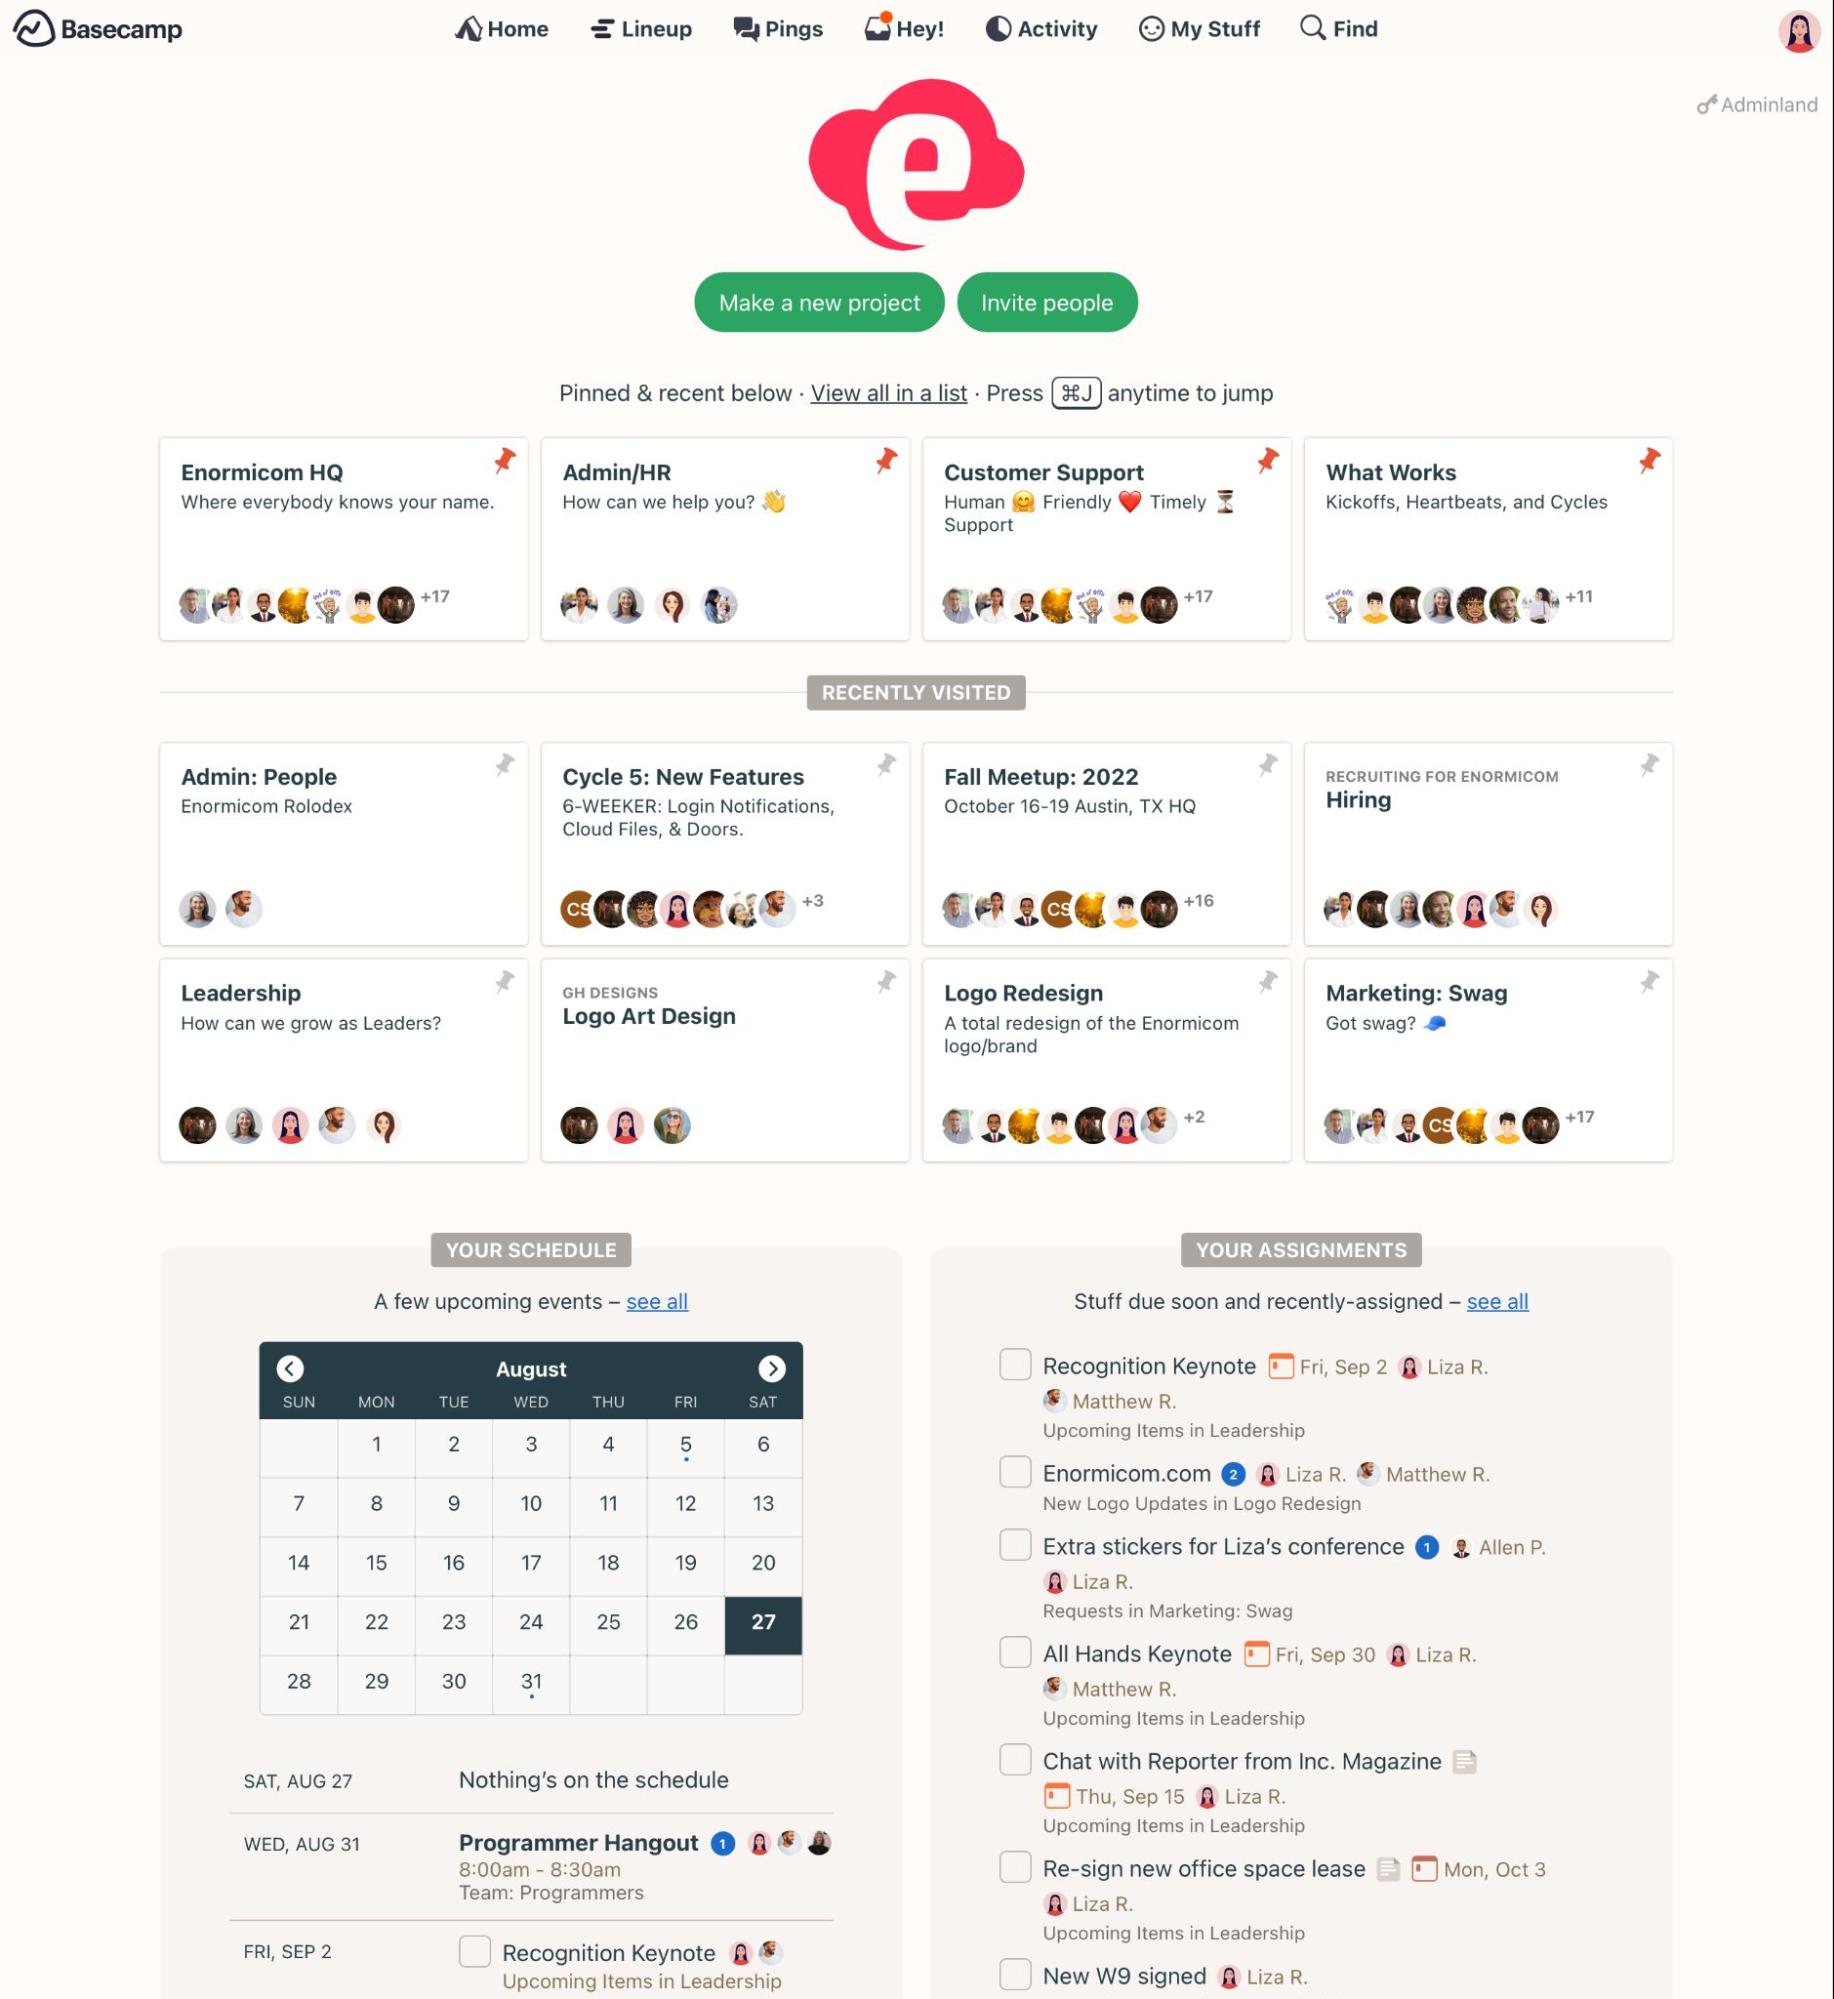
Now, how does one set up their first Basecamp project?
Go to your Home page and hit the green button in the center that says “Make a new project.” A new page will open with plenty of fields to fill in that describe the project you’re about to create.
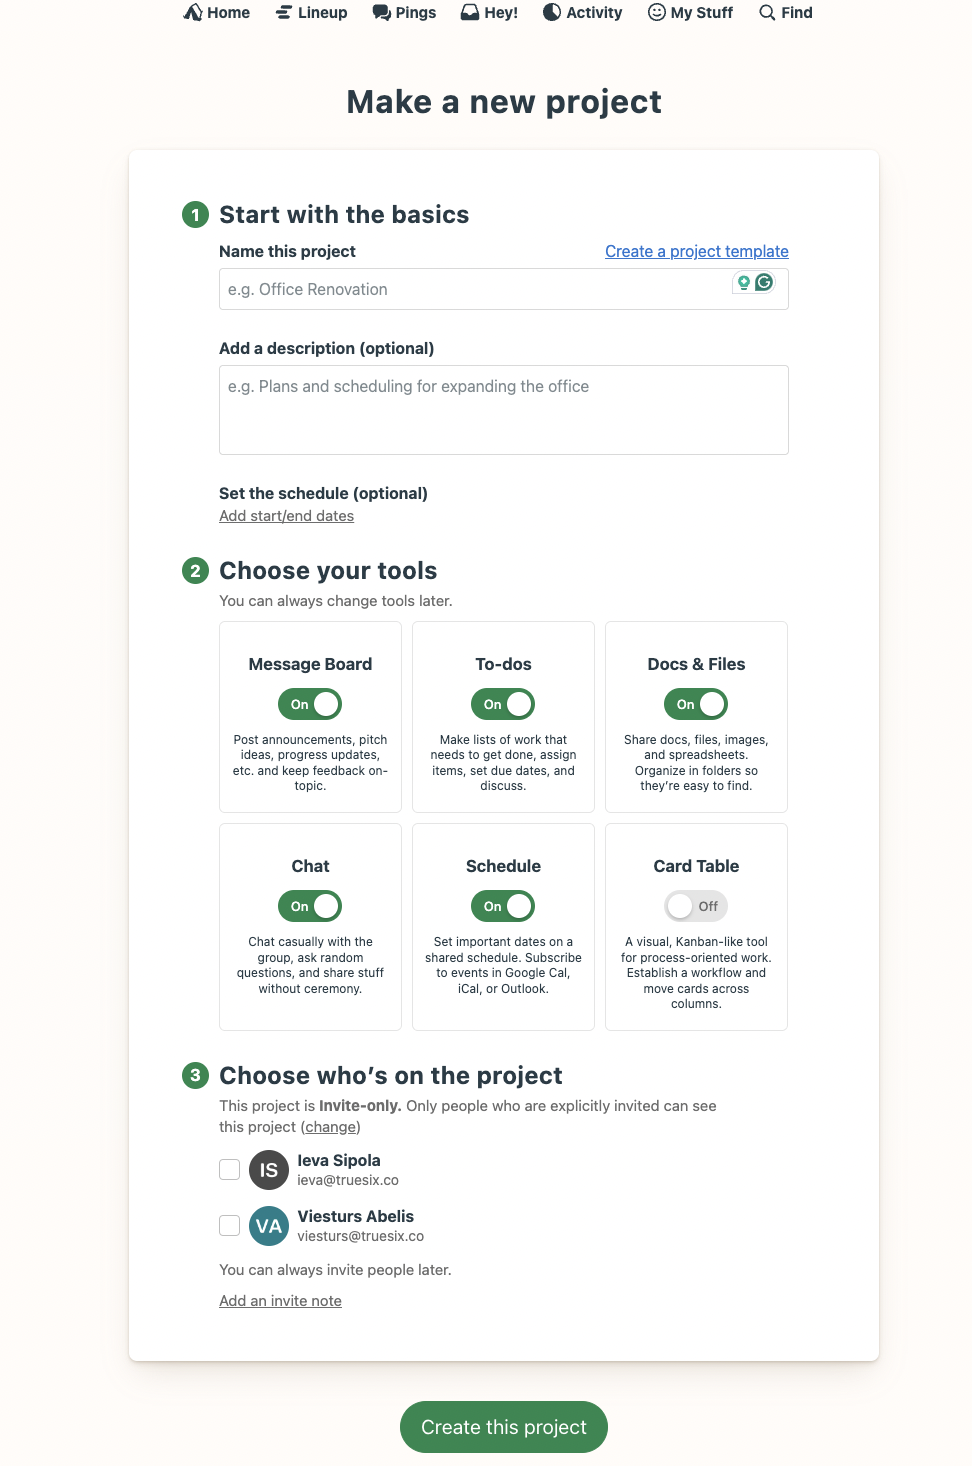
Now, add the name and description of your project and set its start and end dates – that’s the very basics. You can always edit and add more project information later.
Remember to hit the “Create this project” button to save what you have just created.
Add teammates to a project
When setting up a new project, you probably saw a section for adding teammates. We decided to display this step as a separate Basecamp tip for your convenience.
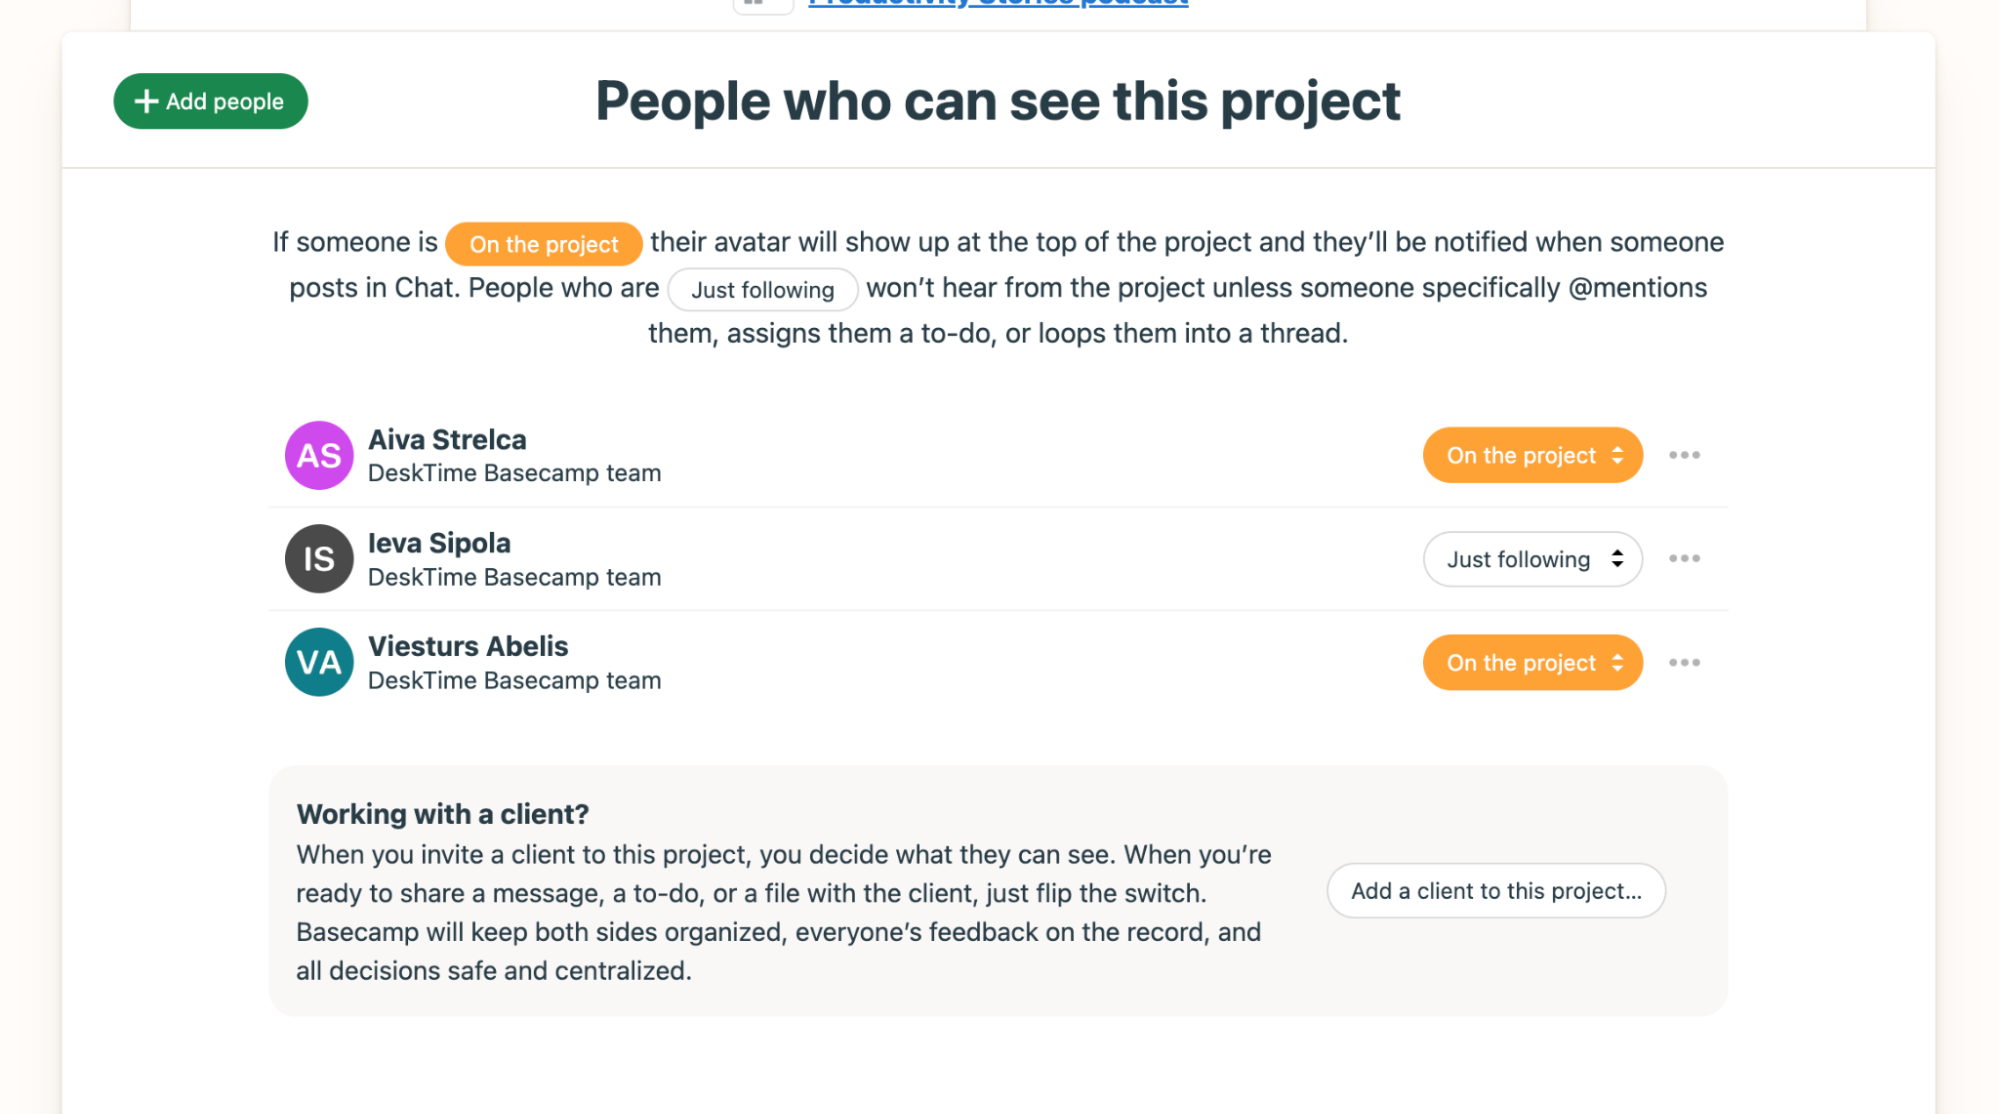
To add teammates to a project, open the project to which you want to add people and hit the “Set up people” button at the top of the page view. Now, you’ll see all the people already on the project (if it’s your first time doing this, you’ll likely be the only one there). Click the “+ Add people” button on the top left corner.
Now, you can add people by typing their names into the box that says “Type their names here…”, and Basecamp will find the users on your account, and you’ll be able to add them to your project. You can also add a personal note to the invite, for example, when the teammate might not understand what the invite is about.
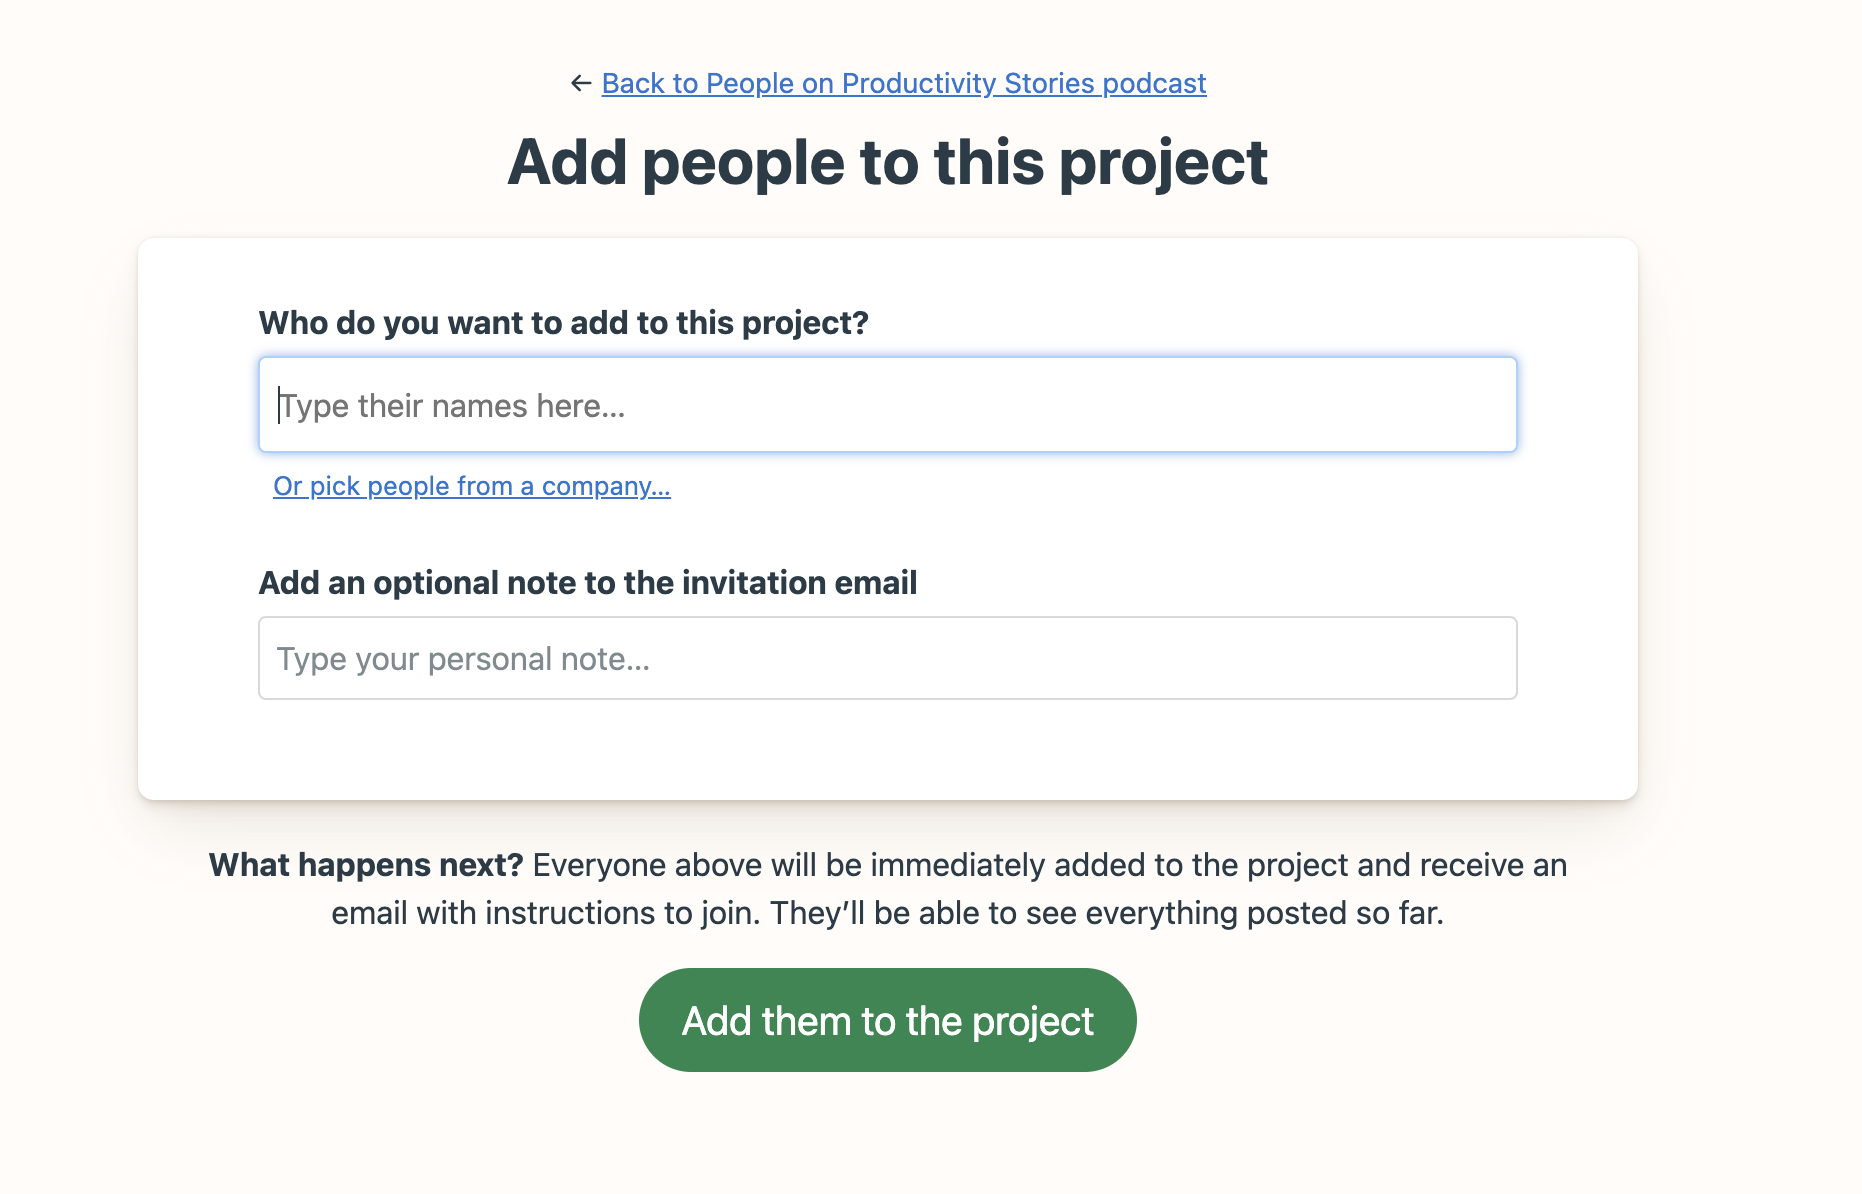
You can also add someone who is not on your organization’s Basecamp account – an outside collaborator, someone who doesn’t use Basecamp at all, a client, etc. To do that, return to your Home page and hit the green button in the center that says “Invite people”. Then, choose who you are inviting.
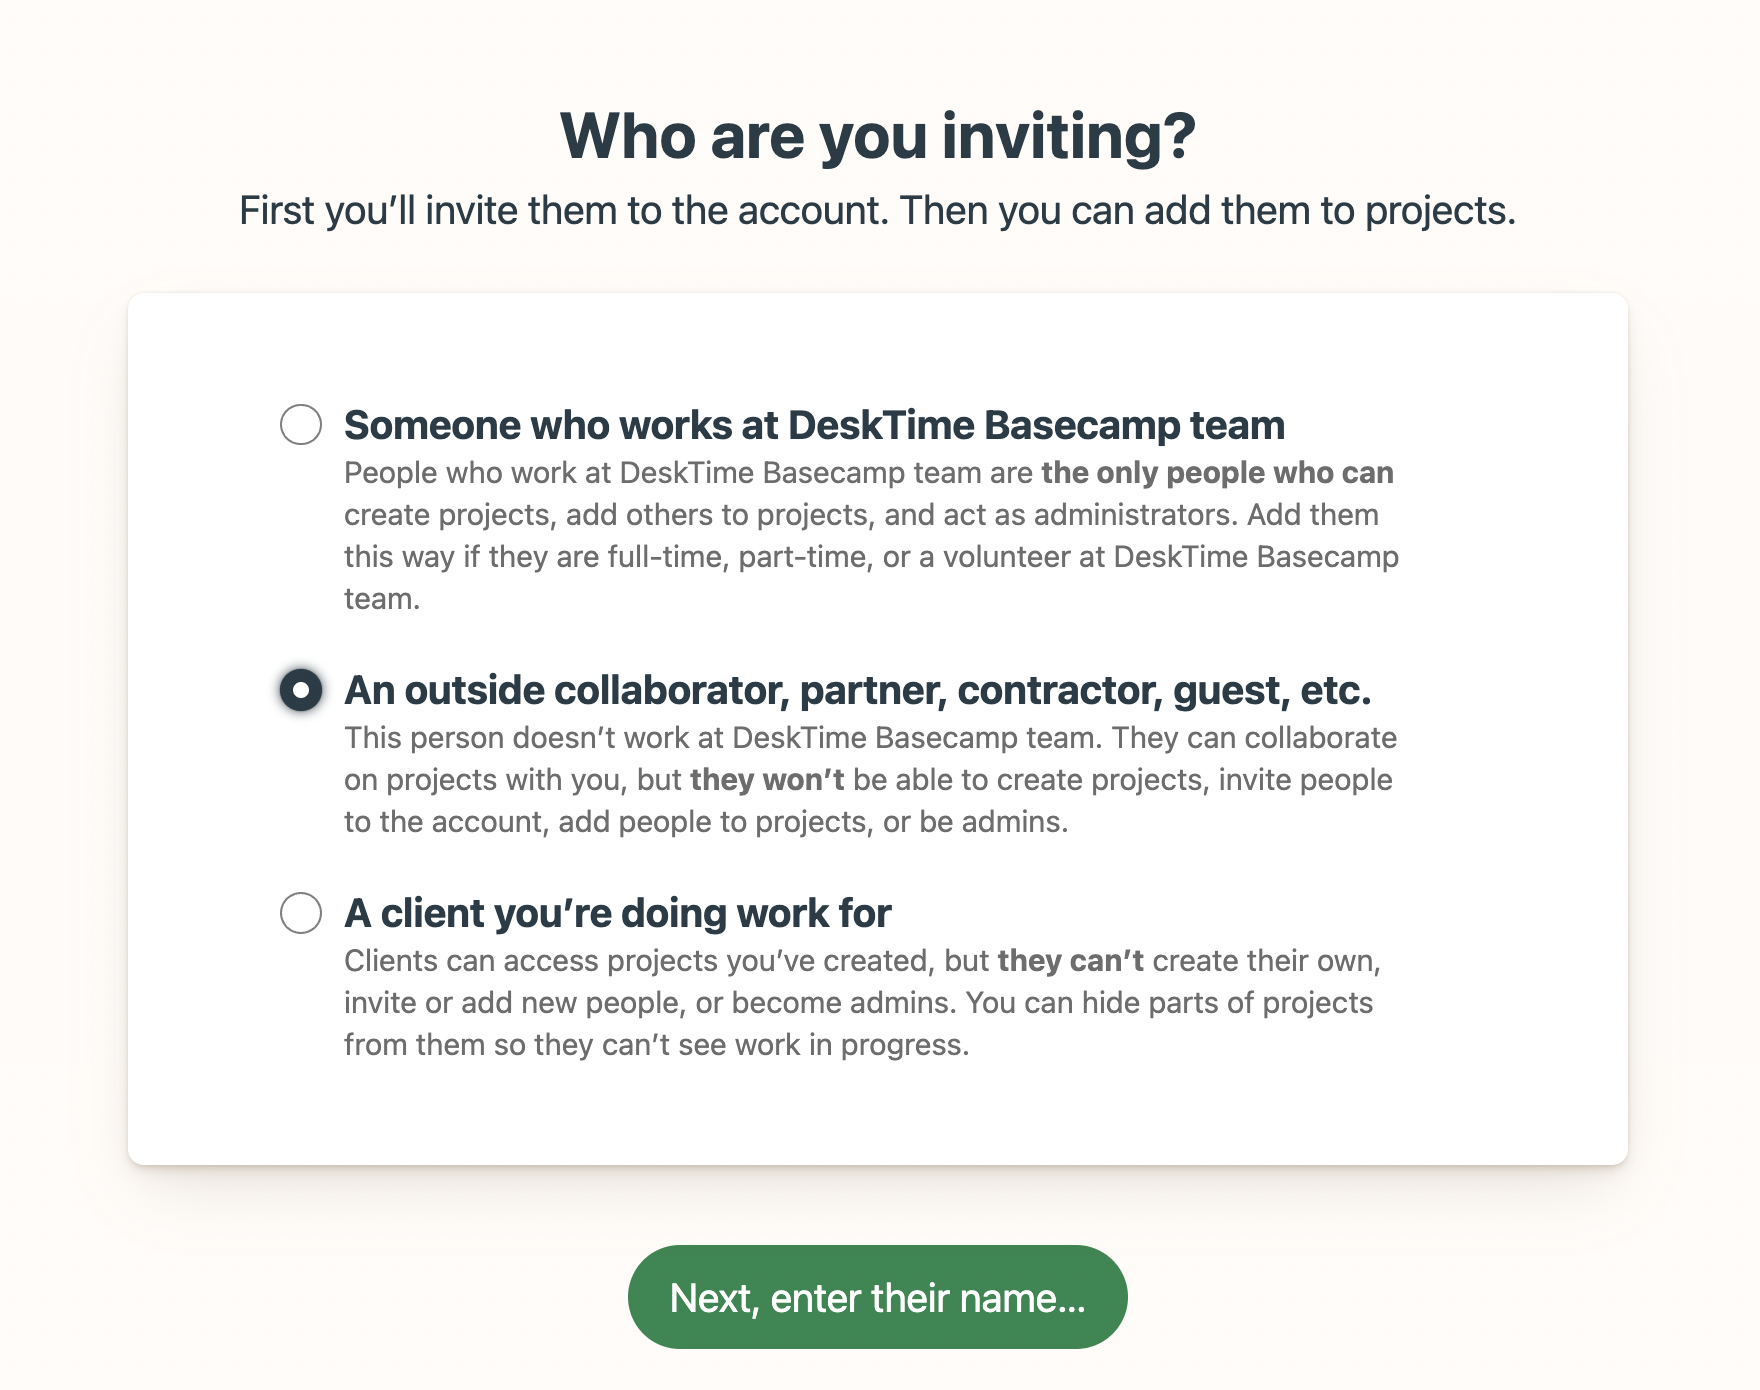
In this Basecamp tips and tricks example, we’ll invite an outside collaborator. You, however, start by selecting the relevant option and click the green button at the bottom.
On the next page, you can add details about the person you want to invite, such as name, email address, job title, and company name, as well as a personal note if needed. Then, send the invitation by clicking the “Email invitation now” button at the bottom of the page.
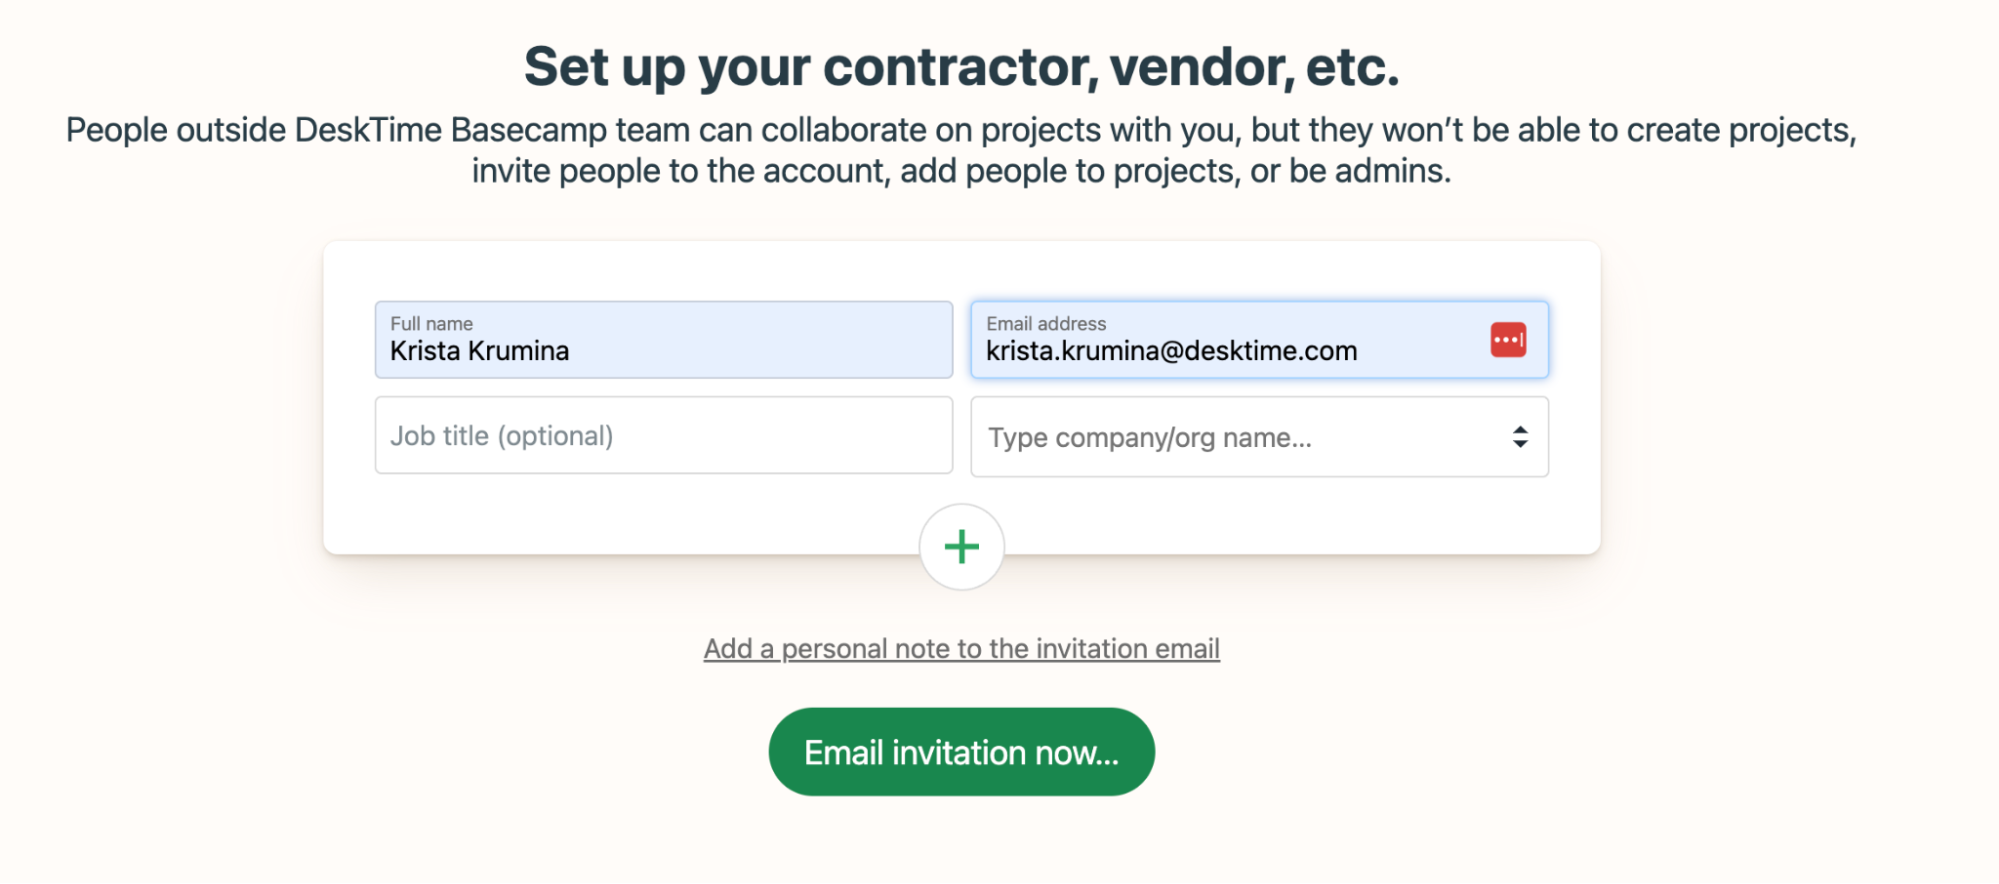
Note: You can also send several invitations at once. Click the green plus button to open another invitation section.
Add project to-dos
Another tip on how to use Basecamp if you’re a complete beginner revolves around adding to-dos to your project.
Basecamp project to-dos are a convenient way to stay on track with what’s there to do and what has already been done. You can create several smaller to-do lists, grouping the tasks into relevant themes or according to deadlines. Whatever your approach is, using to-dos is one of the best beginner Basecamp tips. Here’s how you create one.
Open a project to which you wish to add a to-do list. Then, open the To-dos section at the center of your project view. Click the “+ New list” button at the top left corner, and a window will open where you can add all the necessary information for your brand-new to-do list.
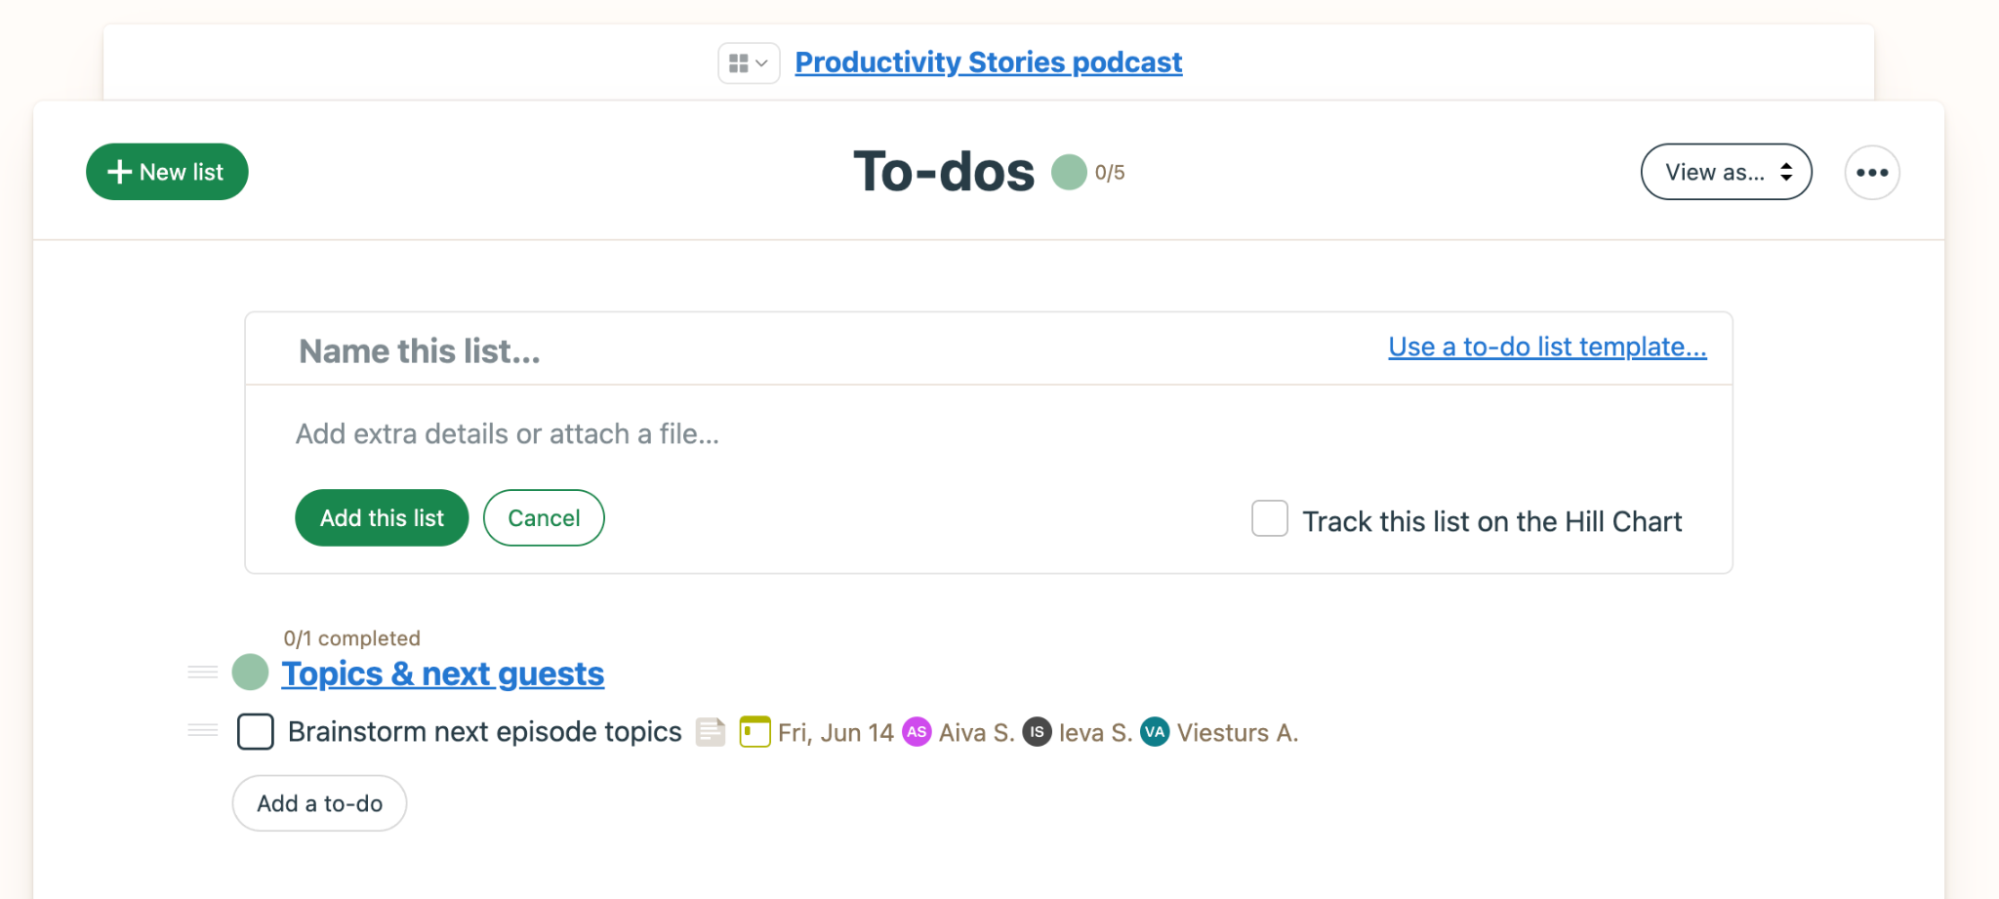
Name the list, add a description if needed, and hit the “Add this list” button. Then, a new window will open where you can add tasks, assign them to particular team members (one or several), add whom to notify when the task is completed, set a due date, and attach relevant files or notes if necessary.
Note: If a task is recurrent, you can set it to a repeat mode so you don’t have to add it manually again.
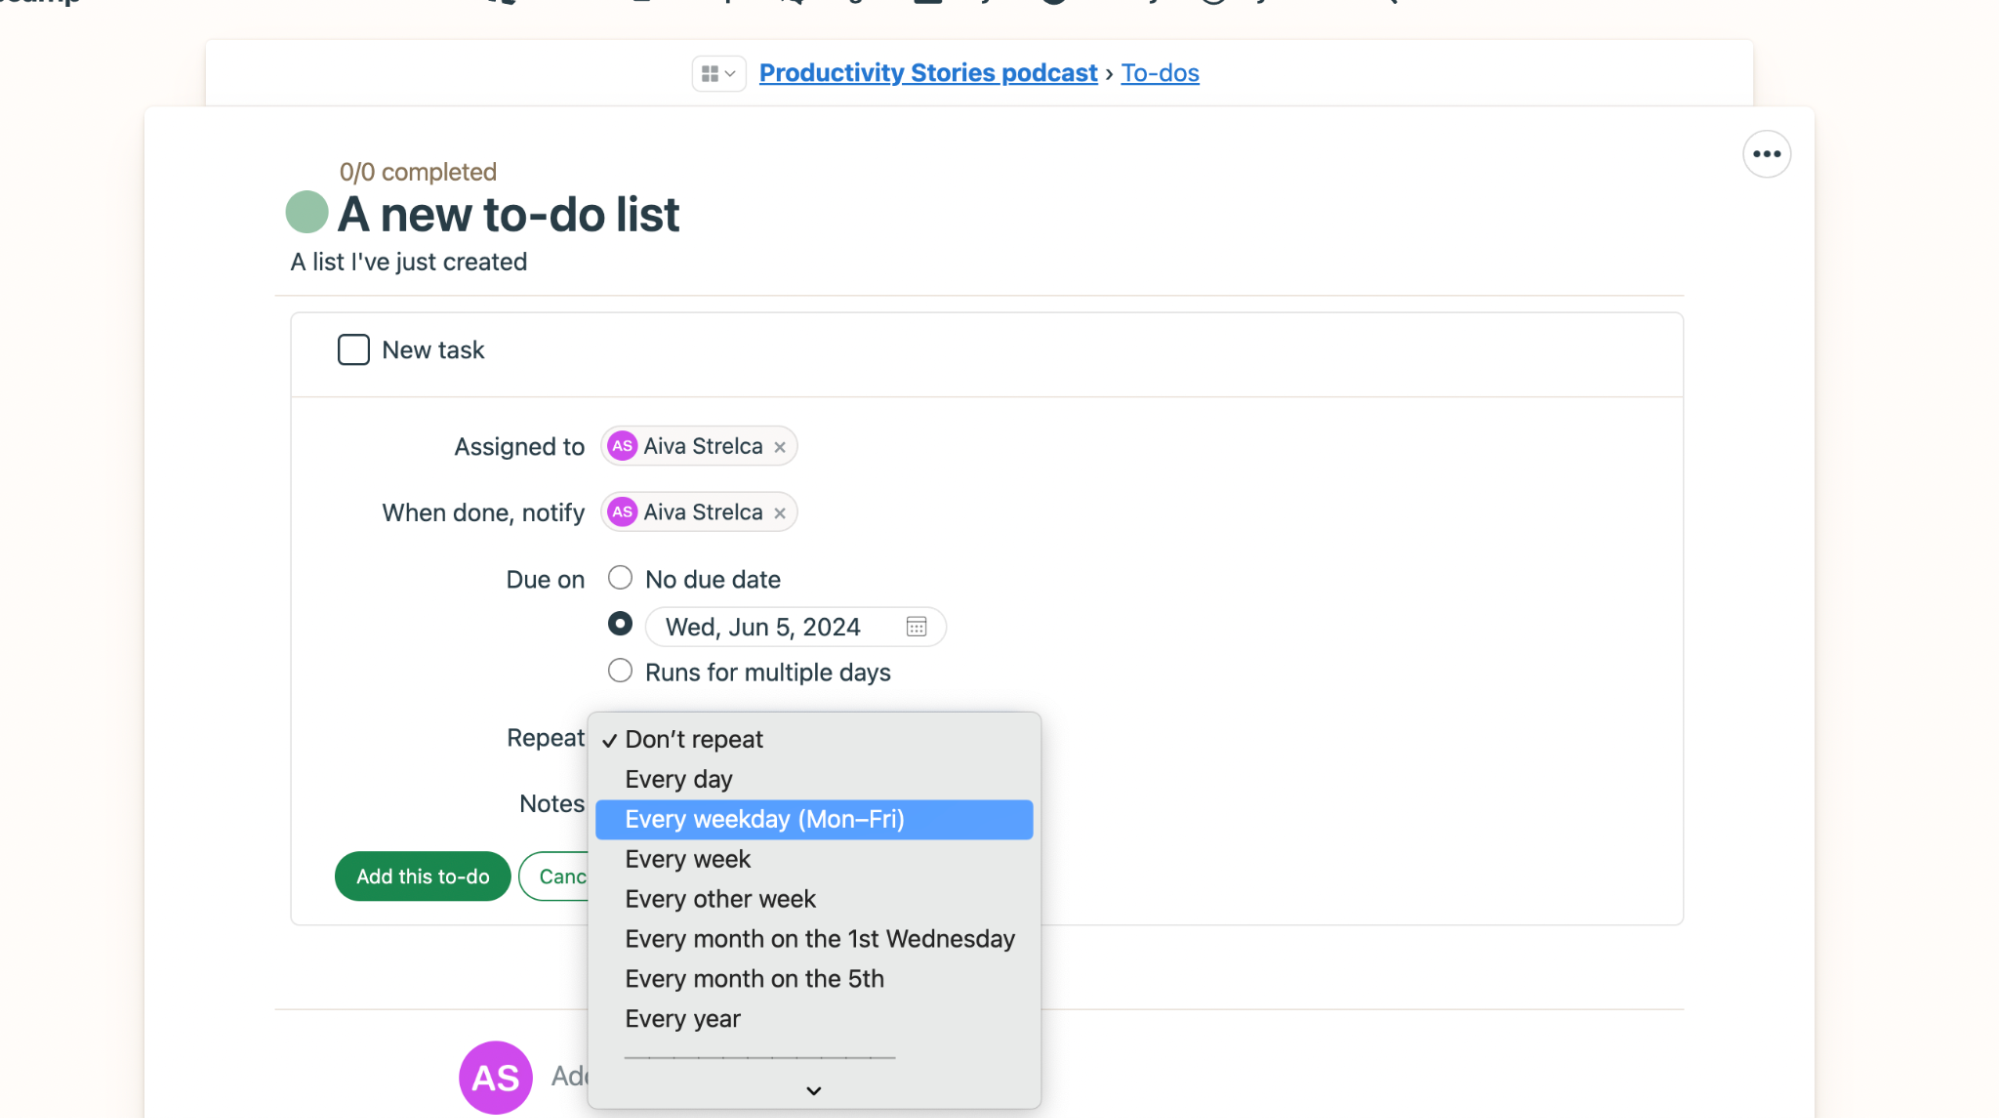
Hit the “Add this to-do” button and say hello to your new list of tasks.
Share relevant files and documents
When using Basecamp for project management, you’ll probably have relevant files and documents to share with the team. Luckily – the tool offers a convenient way to do precisely that. Here’s how.
Open the project for which you wish to share the docs, and on its main page, you’ll see a Docs & Files section. That’s where you can store all project-relevant documents, shared files, and more.

There are several ways you can add documents to your project. Open the section, and you’ll see a green “+ New…” button on the top left corner – click it. Now, several options for adding a new file or doc will appear. You can:
- Craft a new document via Basecamp
- Upload an existing document from your computer
- Link cloud files to Basecamp from several places, including Google Drive, Dropbox, iCloud Drive, Notion, and others
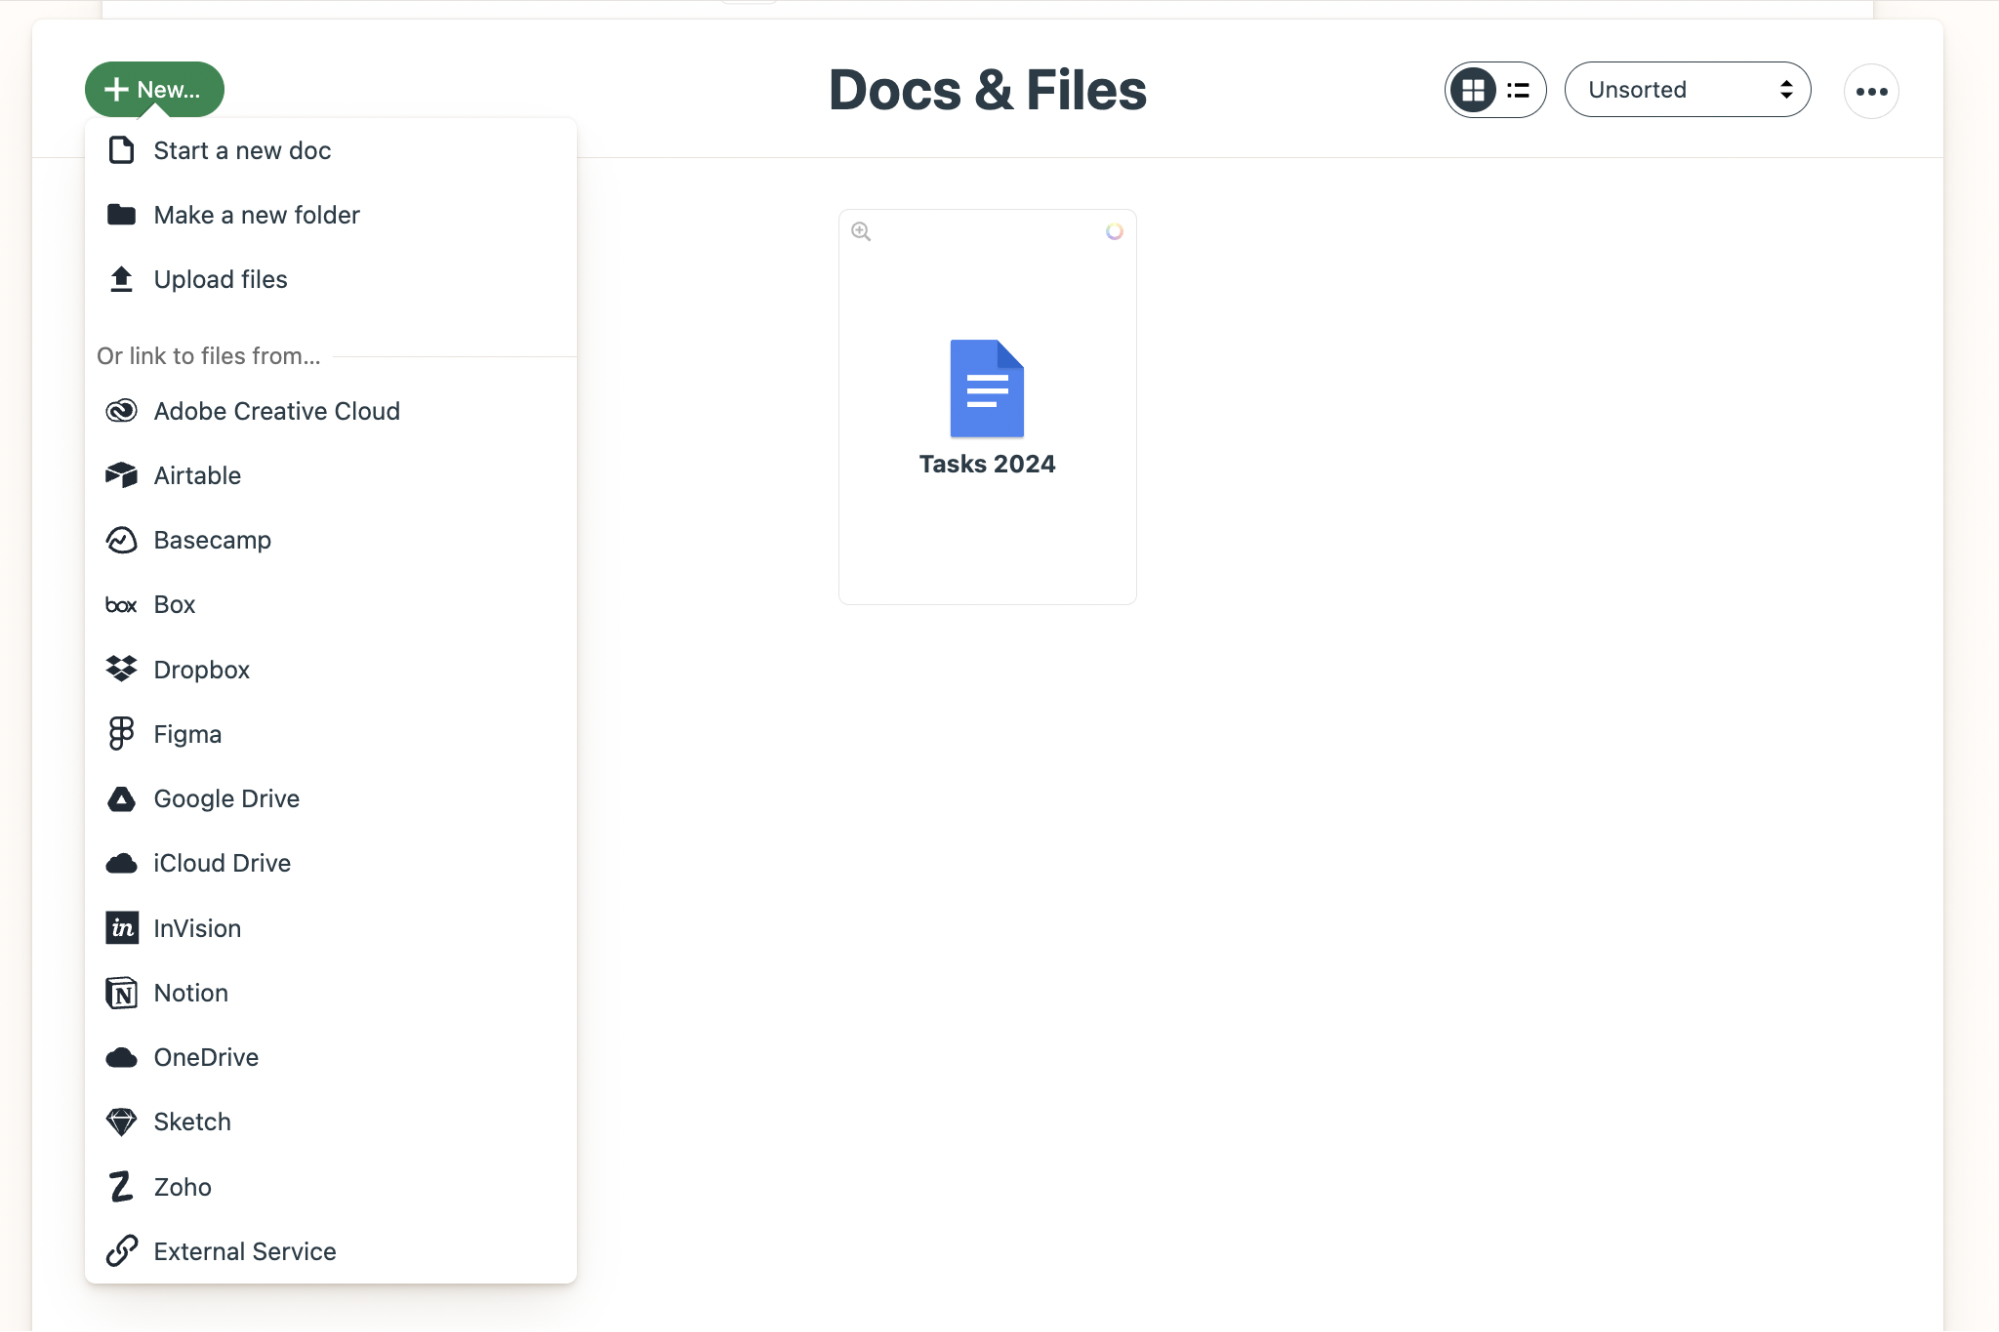
As you can see in the screenshot above, we’ve linked a Google document here.
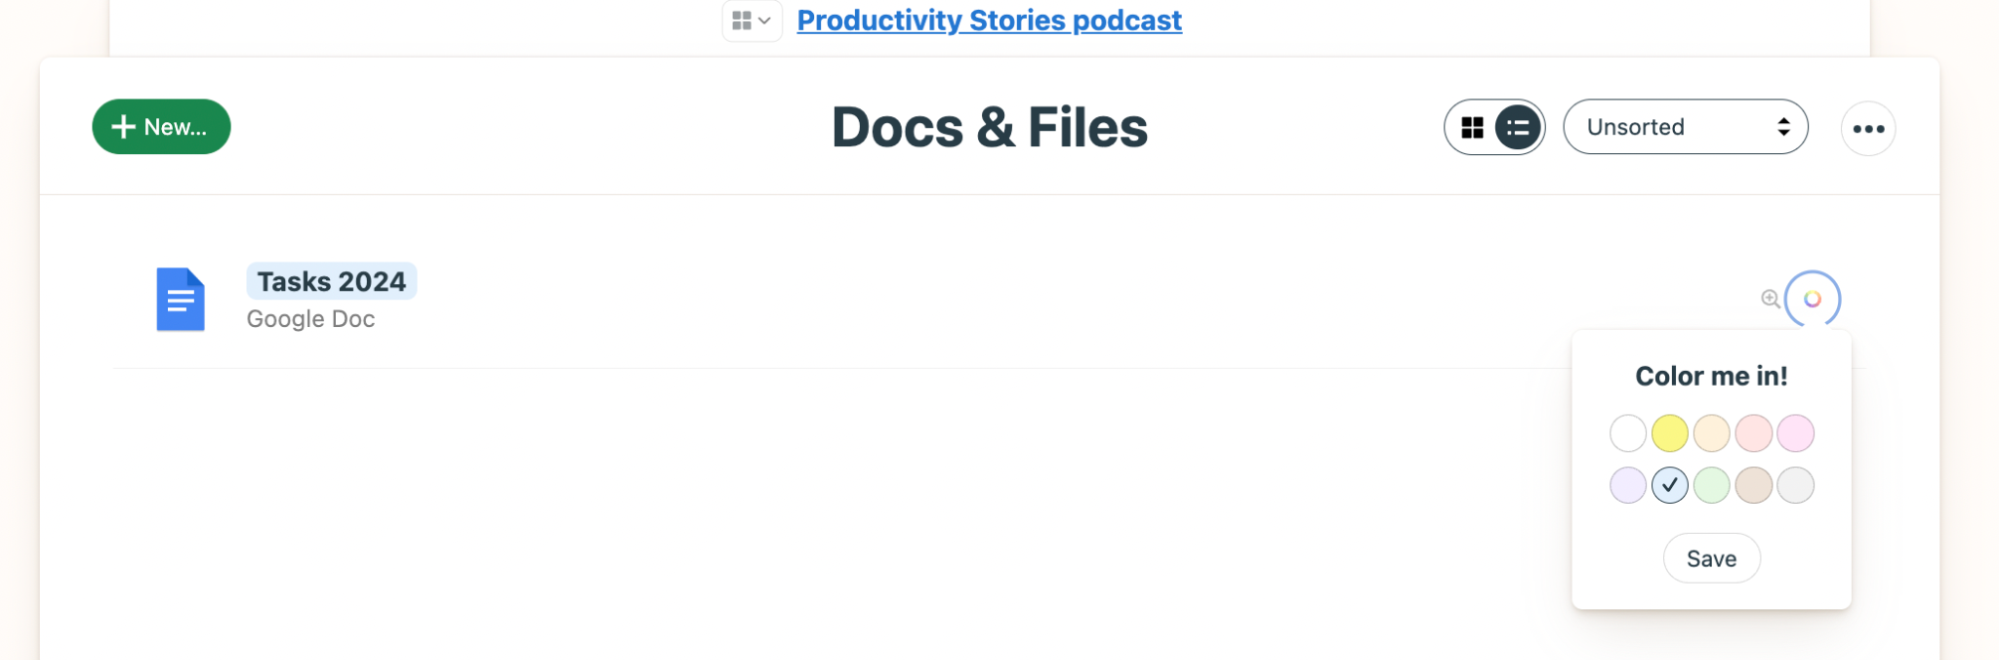
You can also organize your Docs & Files space in several ways:
- Switch to a list view – by clicking the list view icon in the upper right corner
- Sort the docs and files by name, creation date, and last modification – by selecting the sorting mode from the list (the docs are unsorted in default)
- Color-code the files to navigate them easier – by clicking the rainbow-colored ring placed on the document or file
Communicate within your project
Now that you know some Basecamp tips and tricks on adding team members, crafting to-do lists, and placing documents and files in one place, it’s time to learn how to communicate with your project team using the tool.
When opening a Basecamp project, you’ll see two sections related to communication: the Message Board and Chat.
The Message Board is used for project-wide communication, such as making announcements, communicating something to everyone on the project, pitching ideas, and more. To add a new message, click the “+ New message” button at the top left corner, leading you to a message-crafting section.
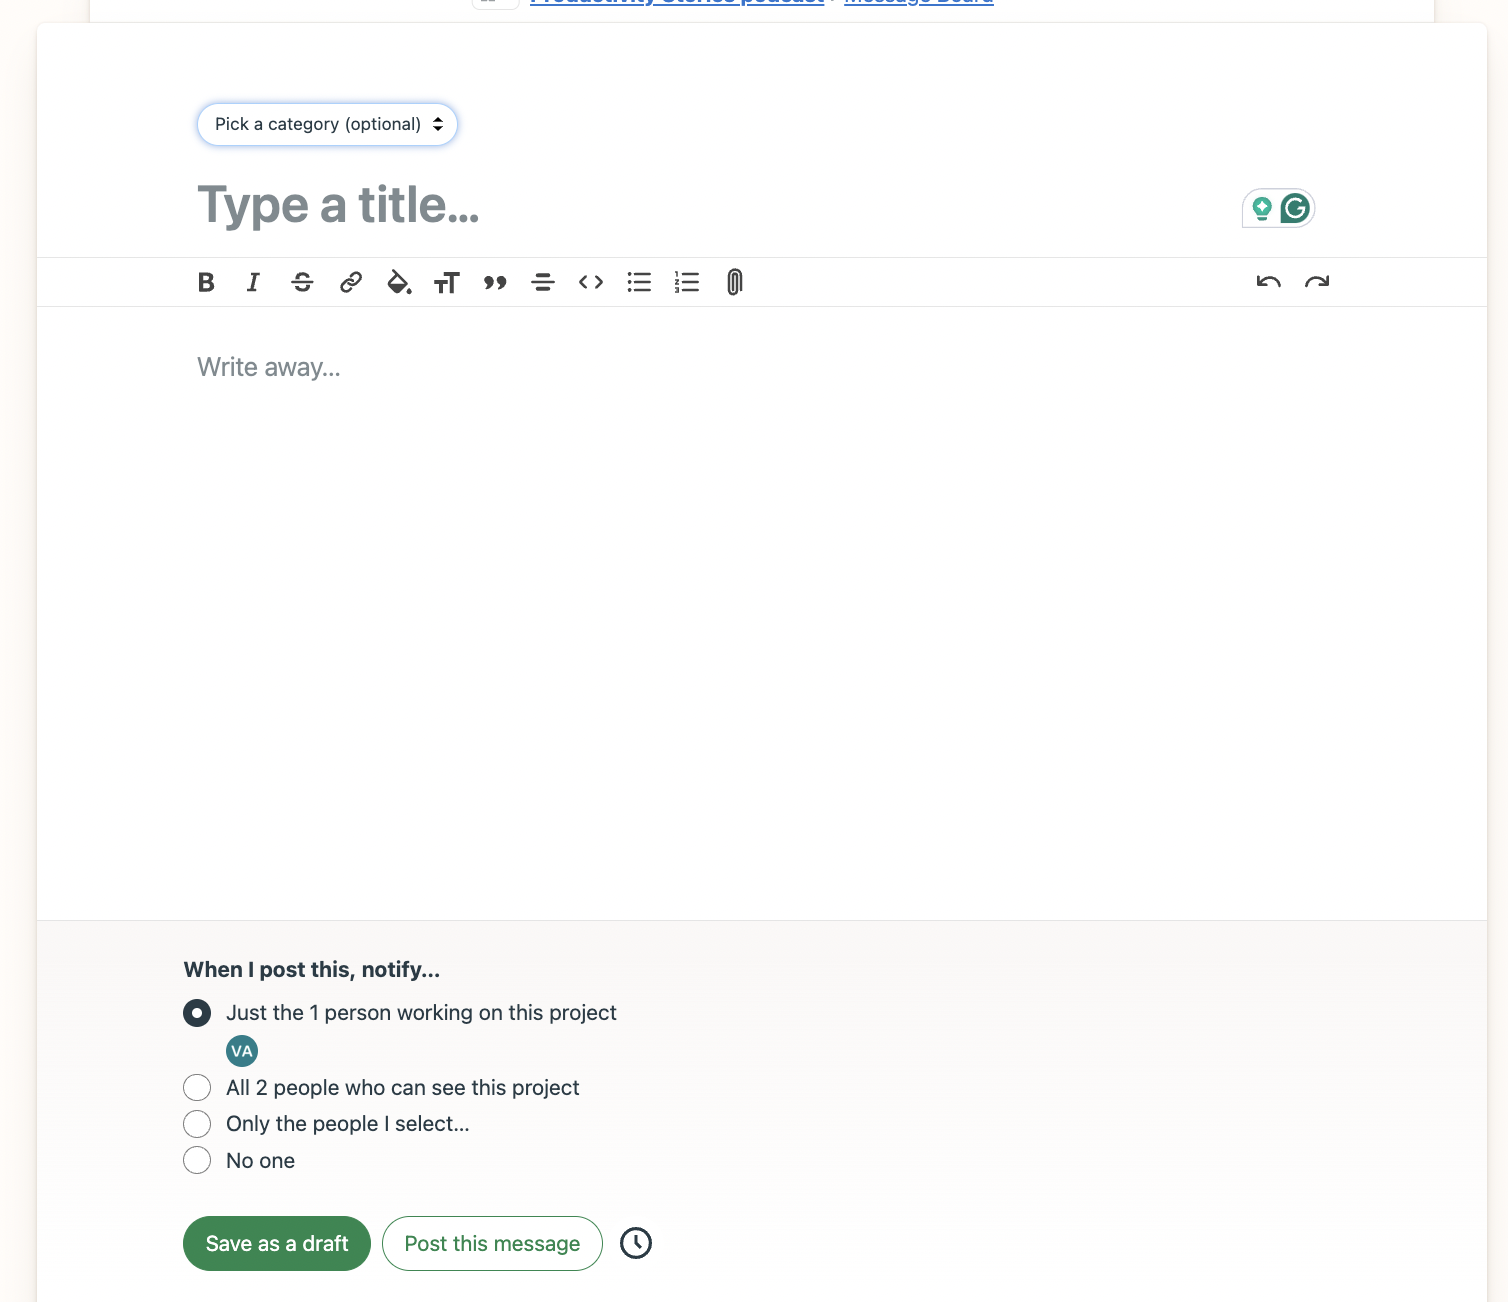
Now, you can type in all the information you wish to share with your team. You can also pick a category for your message. By default, Basecamp offers announcements, FYIs, heartbeats, pitches, and questions, but the default categories can be edited and adjusted to fit your project needs. You can also choose whom to notify about your message. To post the message, hit the “Post this message” button.
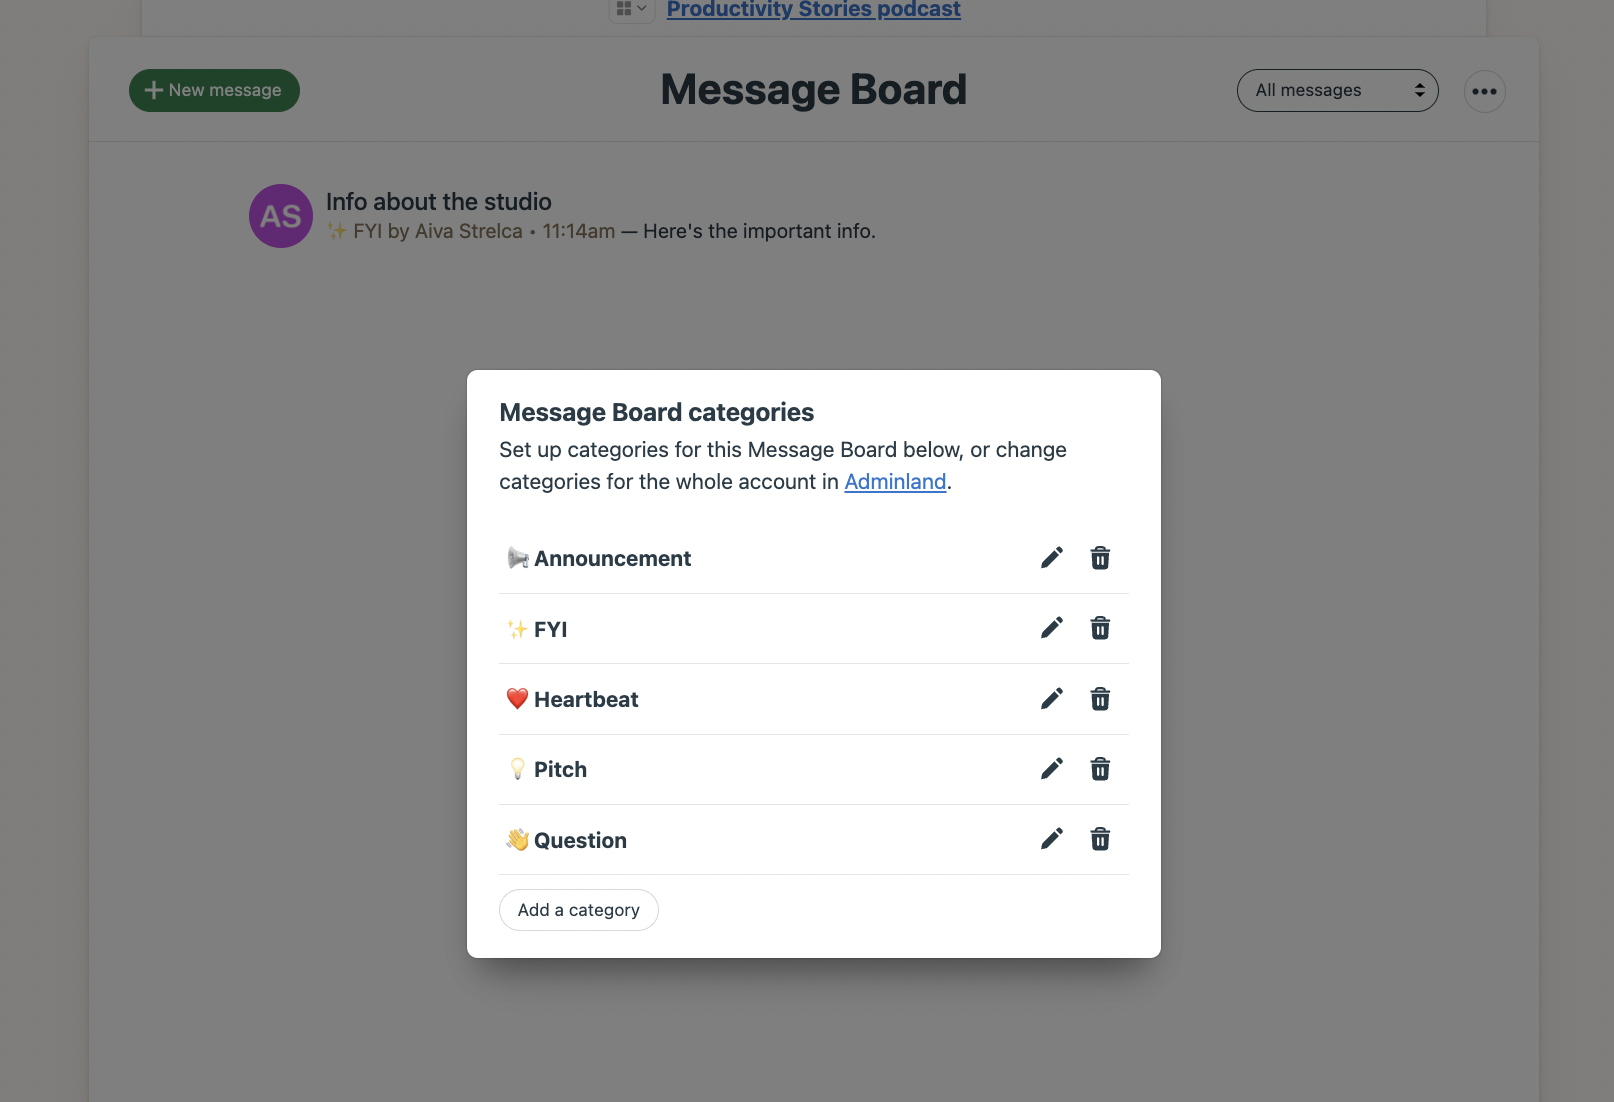
Note: To edit message categories, open the Message Board and click the three dots in the upper right corner. Then select “Edit categories,” and a pop-up window will open, allowing you to edit or add new categories.
Now, let’s move on to the Chat section. Every project on Basecamp has its own Chat room, an efficient way to communicate with your team without switching to other tools or apps.
Messaging via Basecamp’s Chat is easy – simply type your message into the chat box.
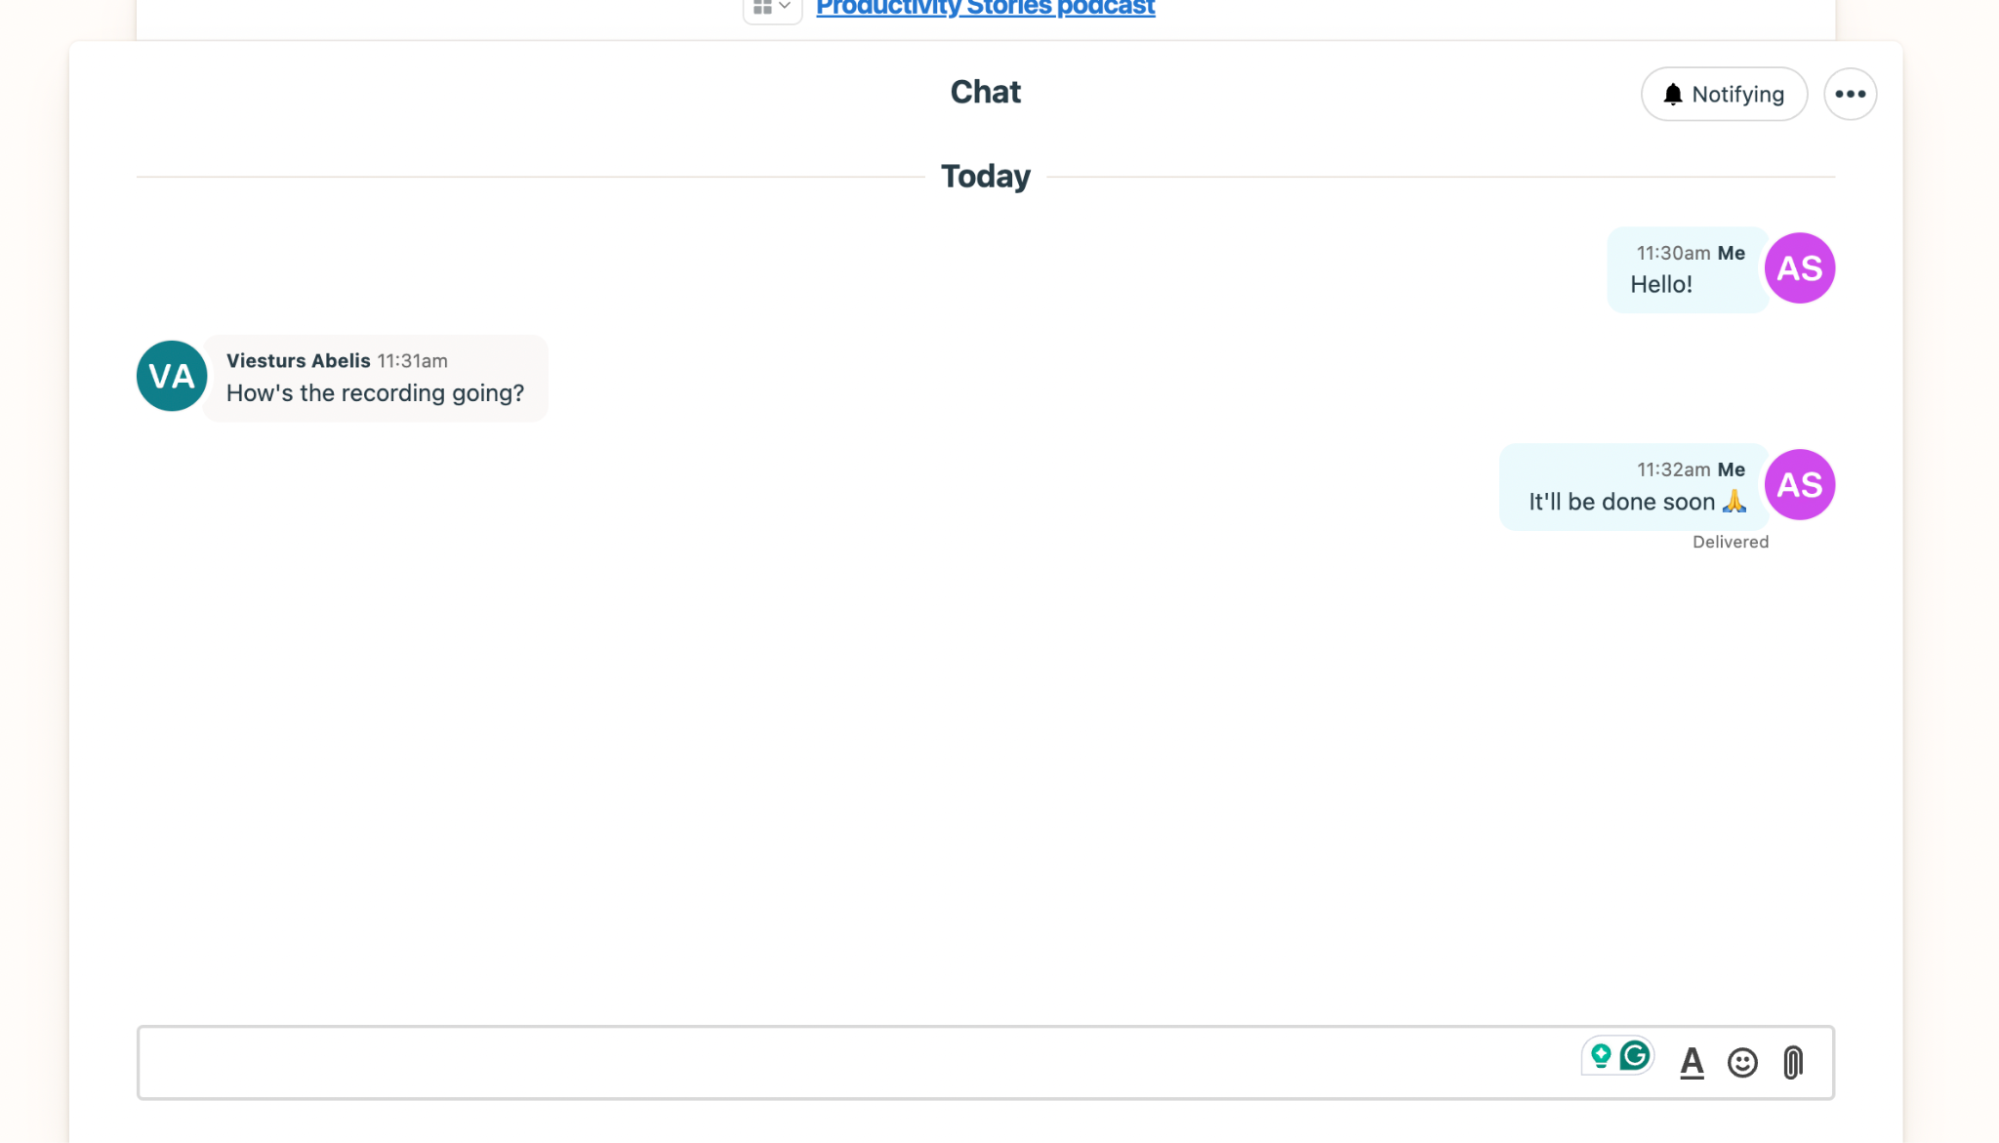
Like most chats, Basecamp allows you to format your message, use emojis, add files, reply directly to messages, @mention someone, react to messages, and more. What’s convenient is that you can view all of the files posted in the Chat room in one place. To do that, click the three dots in the upper right corner and select “See all files posted here”, and you’ll be able to browse through the files shared in the chat.
Basecamp tips and tricks for smoother workflow
Now that we’ve covered the basics let’s discuss Basecamp tips and tricks for a more efficient and focused workflow.
Two Basecamp tips and tricks to avoid unnecessary distractions
Among Basecamp tips and tricks, these are the quickest fix for a smoother workflow.
Imagine yourself in focus mode when a notification pops up, kicking you out of that deep work state and directing you to check out what’s the matter, only to find out that it’s something about a project you’re not currently involved in. Your focus is out the door for nothing. Annoying, right?
Here’s one of Basecamp’s tips and tricks for this – adjust your participation level in a project and receive important notifications only. You can do that by choosing the “just following” status for a particular project. You’ll still be able to see all the project information and access all the docs, lists, and other whatnots, but you won’t be bothered by irrelevant notifications. Here’s how to set it up:
Open a project for which you want to silence the notifications. Then click the three dots in the upper right corner. Several action options will appear. Among them, choose “Switch to just following”.
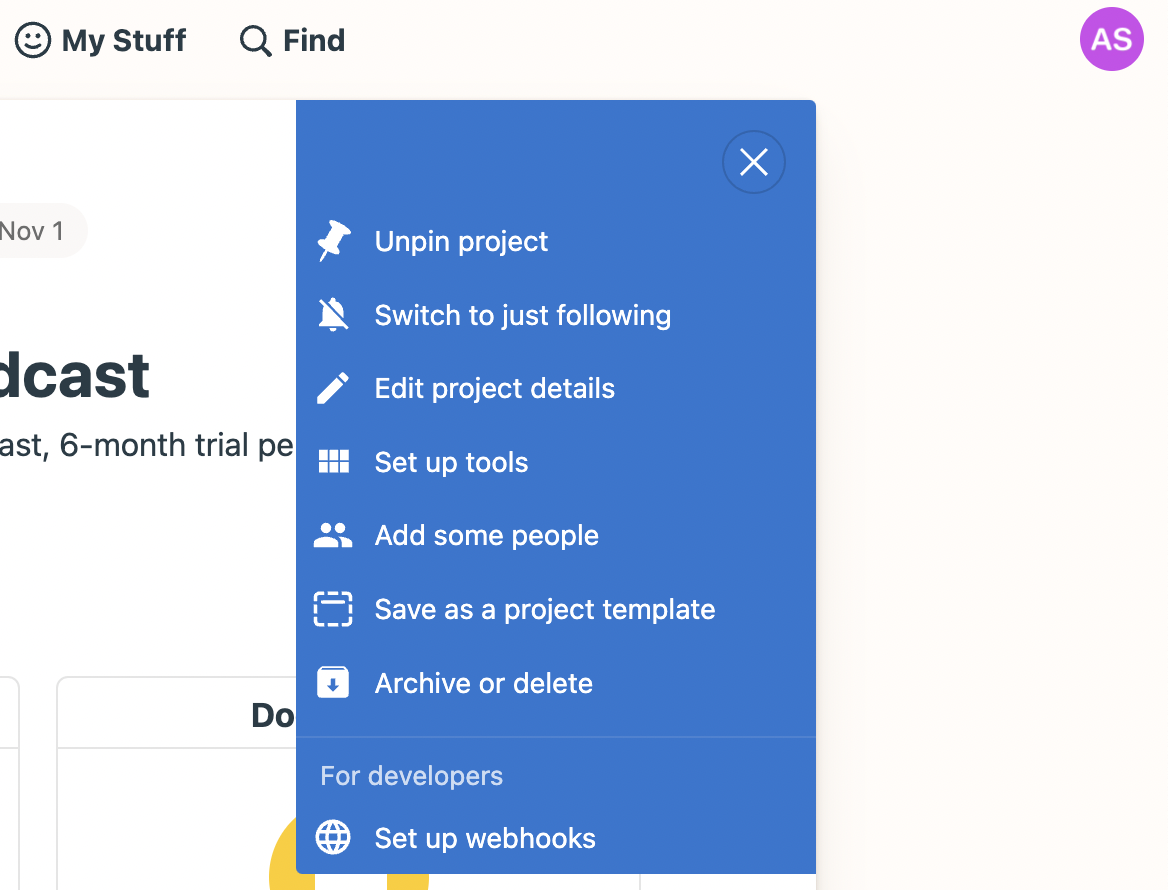
Now, you will only be bothered by project notifications if someone @mentions you or if there are relevant assignments.
Another option for uninterrupted deep work sessions with Basecamp open in the background is to turn on the tool’s Focus mode. Doing that is as easy as it gets. Click on your profile icon in the top right corner, and you’ll see a window open likely saying that your notifications are on. Below that, find a button saying “Turn on Focus Mode” and click it.
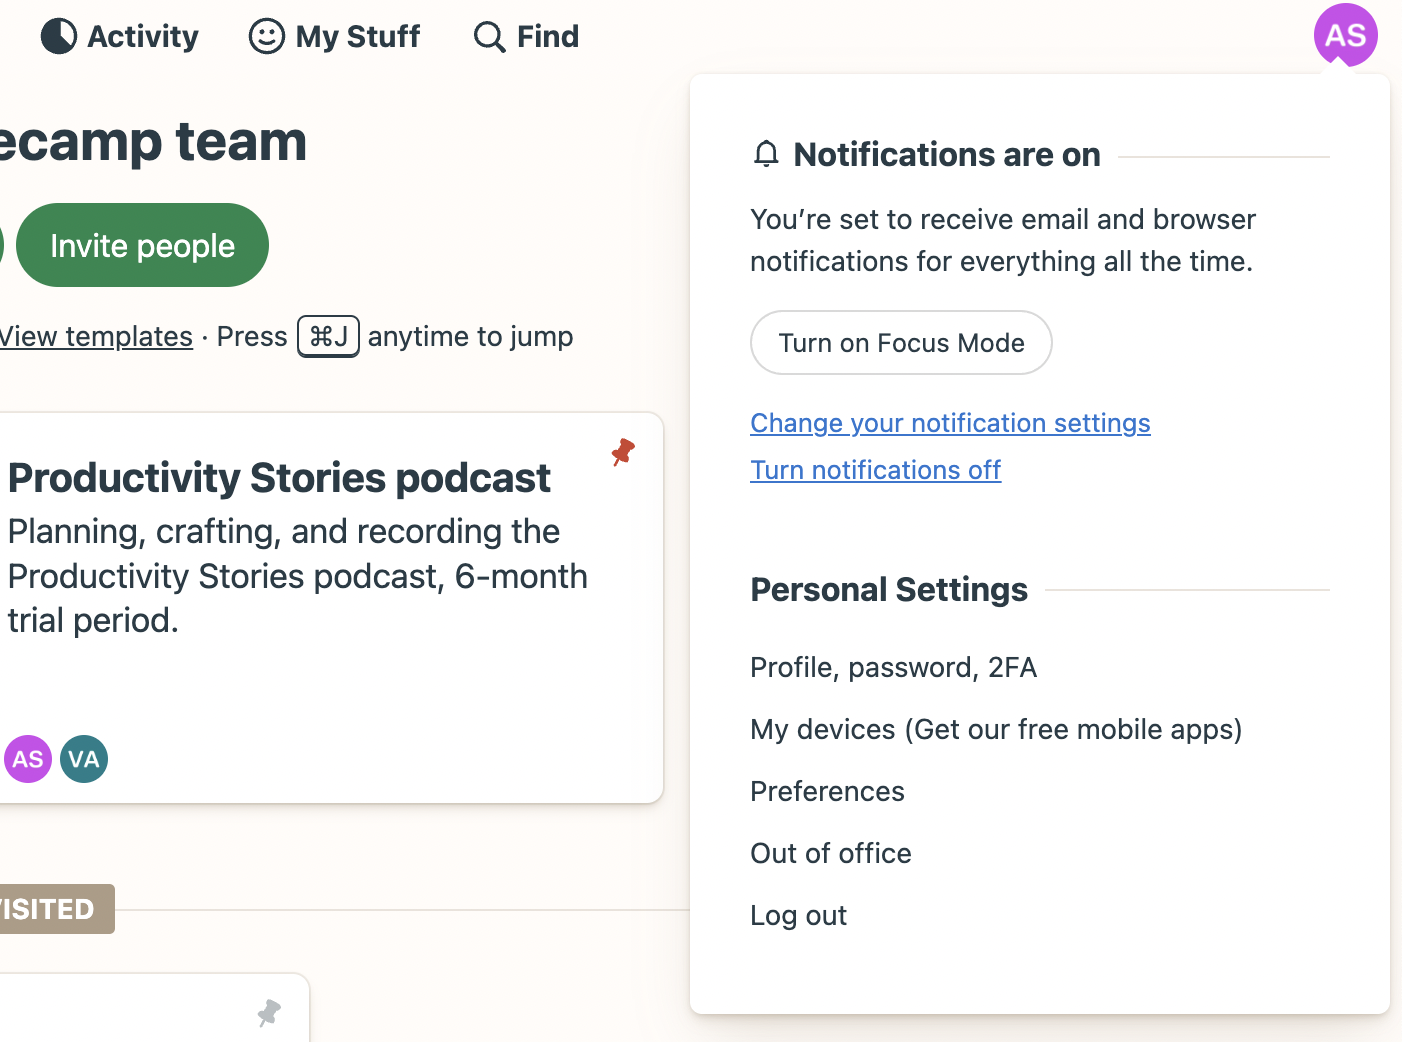
Now, your notifications are silent, and you can return to that deep work.
Save time with Basecamp boosts
This Basecamp tip can save time when writing responses or comments. And even though it seems like a tiny hack, it can be helpful to maintain a steady and efficient workflow.
Basecamp offers boosts – a short way to directly respond to something without writing an entire comment. A boost’s length is up to 16 characters and can contain text and emojis.
You’ll likely notice a 🚀icon on messages, docs, comments, and elsewhere when working with Basecamp. This is a boost icon, and when you click it, a small pop-up window appears where you can type your short reply. Here’s how that looks in real life:
Integrate Basecamp with a time tracking tool
Invoicing project clients is equally as important as managing projects and supervising project teams. Even the best-managed projects can be tricky to bill, especially if they’ve been lengthy and involved many people. Plus, project cost changes are not uncommon, but it’s not always easy to explain them to clients.
We have a simple fix to this issue – integrating Basecamp with a time tracking tool such as DeskTime.
Why should you?
With Basecamp integration, DeskTime can track specific projects and tasks, creating valuable data reports that will be handy in client talks. Moreover, you’ll be able to set hourly rates for each team member, track their hours spent on a particular project, and bill your clients as precisely as possible.
Hence, DeskTime will make you forget the pains of a) heated discussions with clients when the project is done, but they question its costs and b) manual project hours and cost calculations.

Want your projects to thrive?
Use DeskTime integration for Basecamp!
Rock your projects with Basecamp best practices
Now that you’re equipped with several Basecamp best practices, you can start your beginner journey in project management. While we didn’t cover all of the Basecamp tips and tricks, we can assure you that the tool is user-friendly and intuitively built. Hence, you’ll have your own hacks to make your project management life easier in no time!
Did you find this article useful? Give it a clap!
Psst! You can clap more than once if you really loved it 🙂