Easy-to-use beginner GitLab tips and tricks
Learning new hacks for the tools you use daily is always helpful – that’s why this time we’re diving into GitLab tips and tricks. If you’ve just begun to use GitLab and are looking for some guidance, this article exploring GitLab tricks is what you need.
With an estimated 30M registered users and more than 1M active license users, GitLab is a globally-known DevOps platform, helping developers and project managers with workflow management from planning to software launch and monitoring. What used to be a tool primarily favored by developers, thanks to the tool’s convenient features, intuitive layout, and more, GitLab has been embraced by a wider range of professionals.
As the platform has grown in features and functionality, it is often used to manage non-developer-related projects. Thus, GitLab is considered a helpful project management tool as well.
Without further ado, let’s dig into some GitLab tips and tricks that will make your use of the platform more efficient.
Want to get the most out of your time?
Try DeskTime for free!
Try free for 14 days · No credit card required.
By singing up, you agree to our terms and privacy policy.
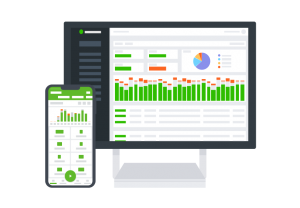
Table of contents:
Tips on how to start with GitLab
So, we’re hitting the road running with tips on how to start with GitLab.
At first glance, the tool can seem confusing due to the wide variety of features it offers, but as with anything new – once you understand the basics, further exploration becomes much easier.
GitLab tricks: Creating a new project
Most of your work on GitLab is done in projects. They’re where the code is saved, related files are stored, and most features are provided within a project’s scope.
Creating a new project on GitLab is easy: find Menu on the top bar of your view, select Project, and then – Create new project.
Afterward, a project creation page will open, and you’ll be able to select and add such things as:
- Project name, description, URL, slug, and visibility permissions
- Whether you want to create a blank project, use a project template, or import an already existing project – either from GitLab or an external source
Once you’ve added all the necessary information, hit the Create project button, and – voila! – your new project is born.
Additional GitLab hack: You can add a star to a project, so it’s not lost in your sea of projects.
- Select a project, find the star icon in the upper right corner, and select it
- Now, the starred project can be easily accessed in the Starred projects section – top bar of your view, Projects

Finding all project-related information
On GitLab, all project-related information – code, history of changes, related files, and more – is stored in a project’s repository. If you’re new to a project on GitLab and wish to wrap your head around how the project is being operated, exploring a repository is where you start.
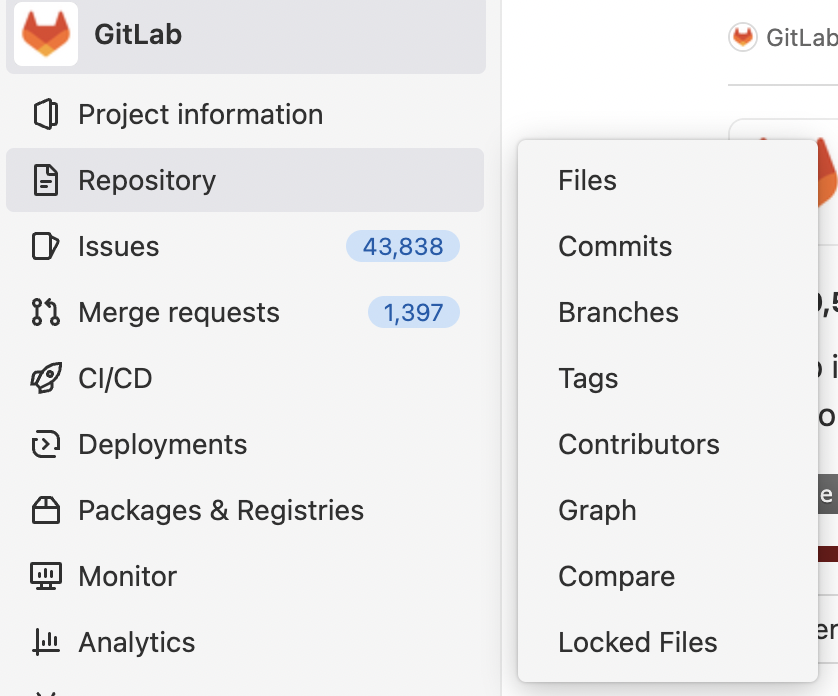
To access a particular project’s repository, open a project on GitLab, on the side menu, you’ll see a Repository section. As you hover over it, a sidebar will appear, offering to access a specific category of the repository – Files, Commits, Contributors, and more. By clicking the Repository section, you’ll access a general overview with all project-related information in one place.
Gitlab tips: Creating issues
If all of your work on GitLab is organized into projects, issues are the next element of the organizational hierarchy – one can view issues as sorts of tasks or points on your project’s to-do list.
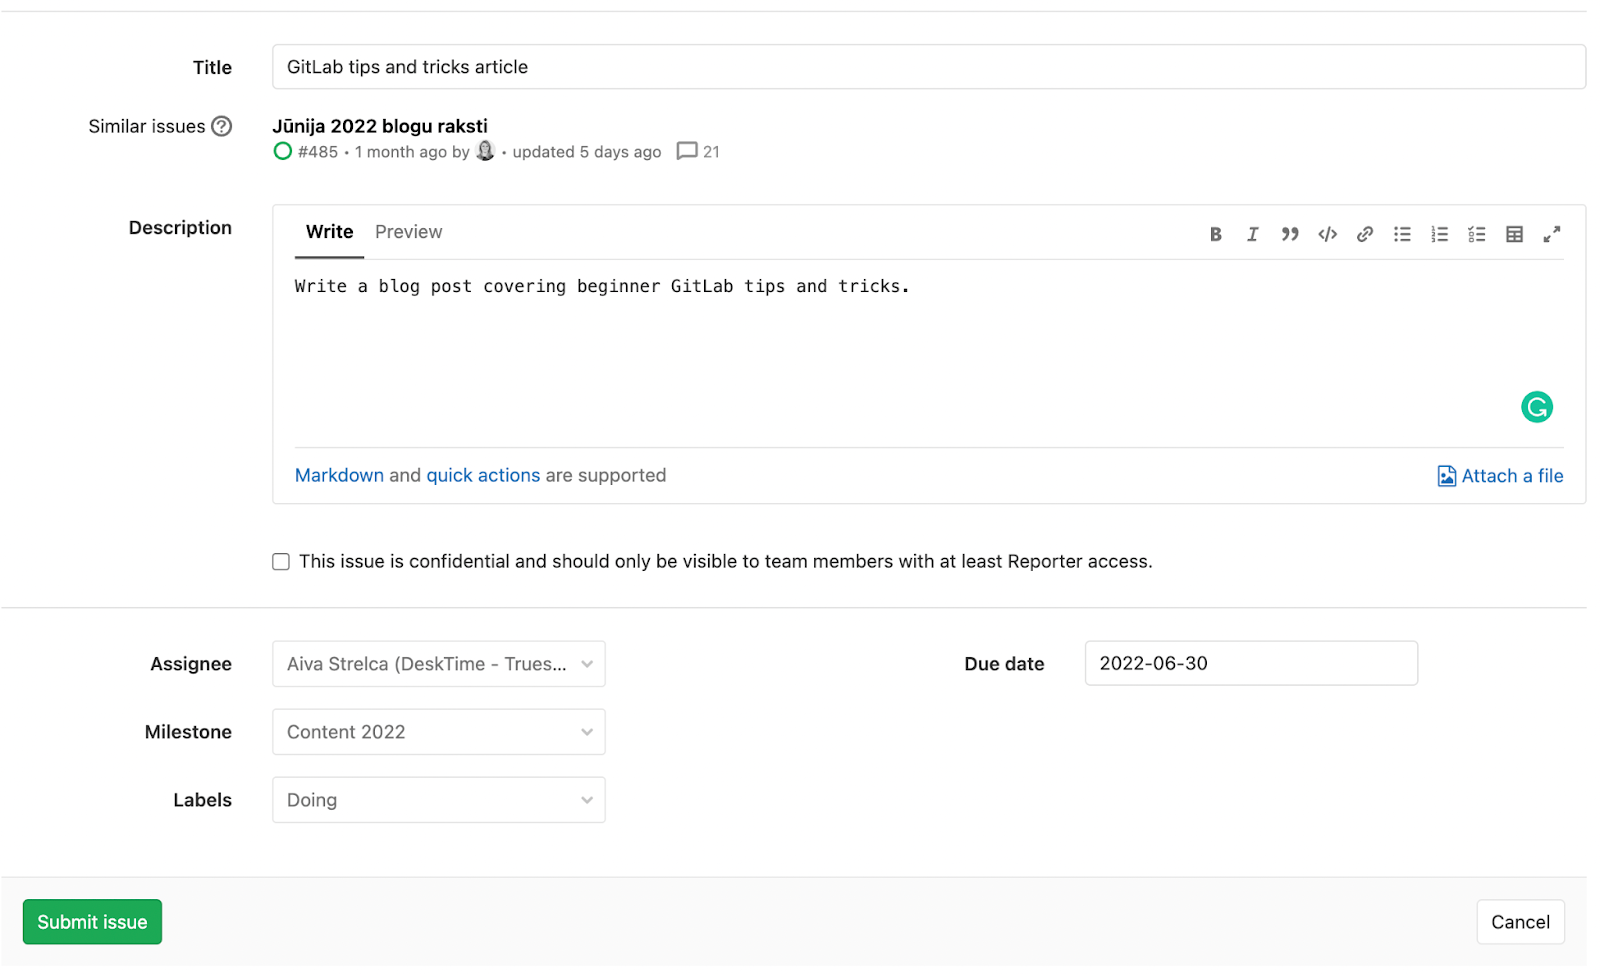
Here’s how you create a new issue in a project:
- Click Issues on the left side menu
- Find the New issue button on the right upper corner

- Now you can add all the necessary information to your new issue – title, description, assignees, due date, labels, confidentiality, and more. You can also link the new issue to some already existing issues
- As you’ve added the info, hit the Submit issue button on the left bottom corner
Organize the work in your new project
Once you’ve created a new project on GitLab, it’s time to start managing your work there. GitLab offers several helpful features helping to organize tasks (issues) within your projects.
You can use a list view that displays you the open, closed, and all issues:

Or you can use the board view that shows you all the tasks (issues) that your team is working on, who is assigned to which task, and what’s the status of each task in the workflow:
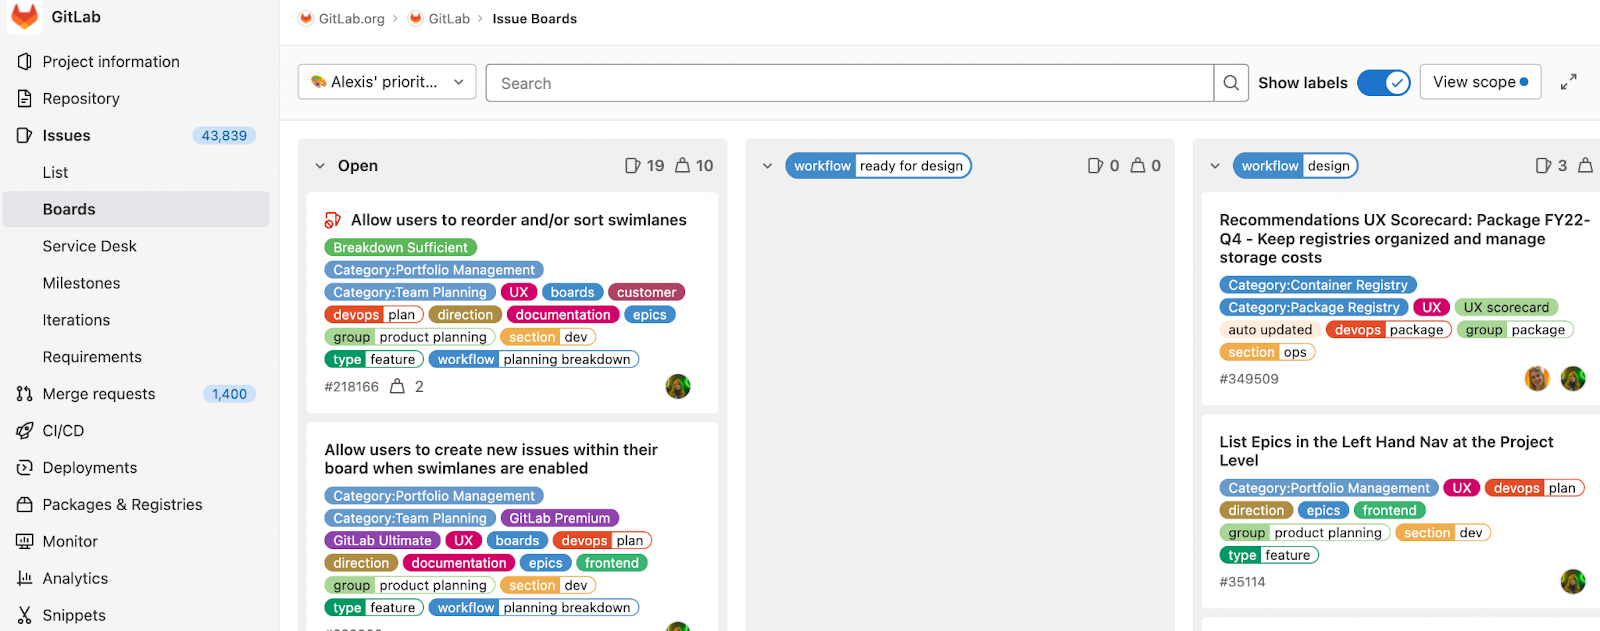
As you open a project’s board, you’ll see issues collected in vertical lists. The issues can then be moved across as they enter a new status. You can also create new boards within a project to organize your tasks more efficiently.

Looking for ways to up your business?
Use DeskTime for time management and always stay on top of your team’s efficiency ratings!
GitLab best practices for beginners
Moving on with some more GitLab best practices for those who’ve just started using the platform.
Using labels
Labels on GitLab are extra handy when it comes to helping you wrap your head around your workload. Especially if you have many people working on the same project, labels make it easier to find and sort your work.
To access labels on GitLab, click Issues on the left side menu, and then you’ll see Labels appear on the menu. Now hit Labels, and the section will appear.
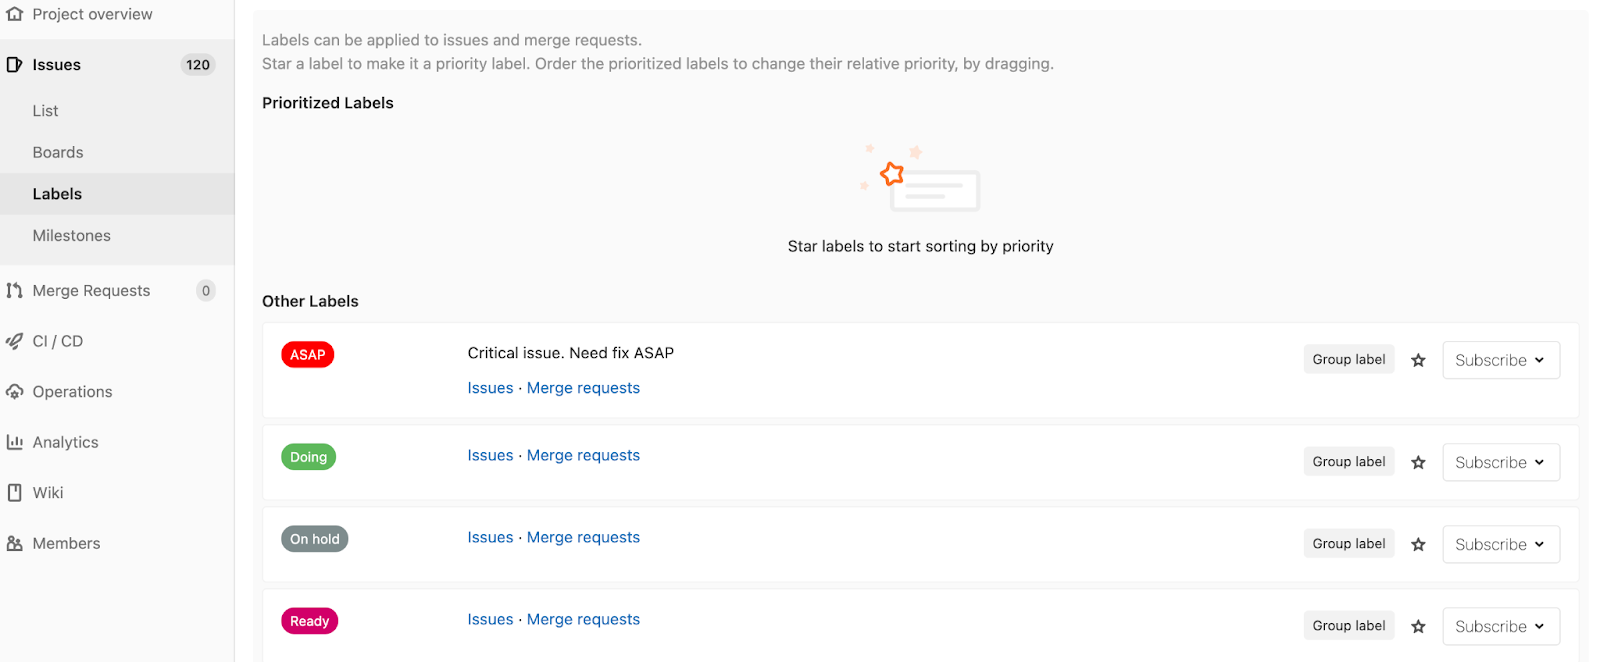
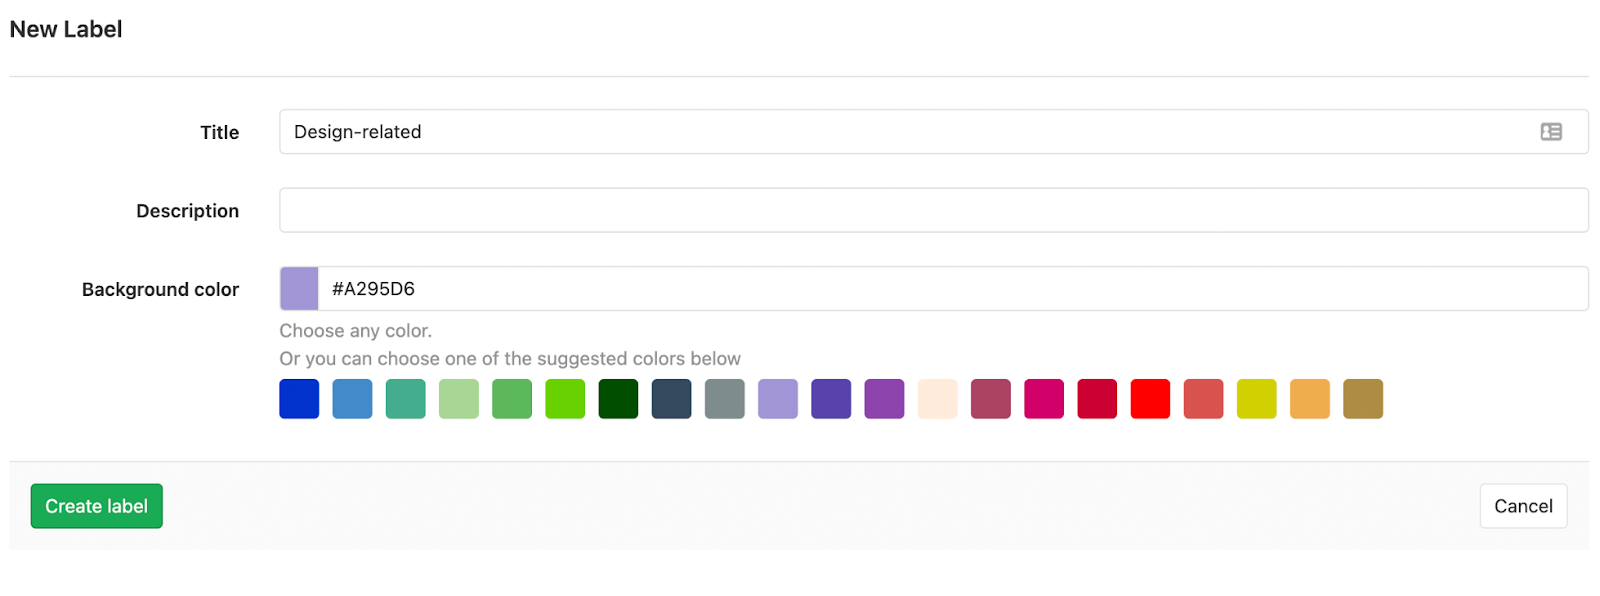
You can now add new, manage and delete existing labels. To add a new one, hit the green New label button on the top right corner of your view. Then add the label title, color, and description, and hit Create label.
Benefit from shortcuts
Another handy Gitlab tip for a more efficient platform use is keyboard shortcuts. To access the window that displays all shortcuts, press Command + ? or click the ? icon on the top right corner and then select Keyboard shortcuts.
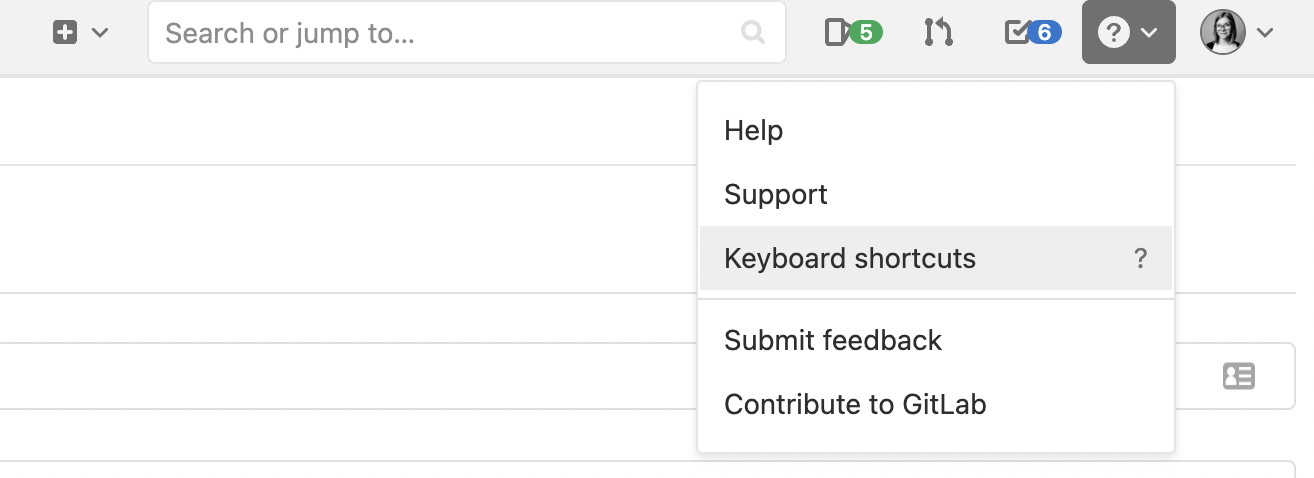
Now a new window with all the shortcuts listed will appear. For your convenience, we’ve listed some basic yet useful shortcuts in the table below:
| Keyboard shortcut | Action |
| Shift + p | Going to your projects page |
| Shift + i | Going to your issues page |
| Shift + t | Going to your to-do list page |
| (When you’re on any page of a GitLab project) g + v | Access project activity feed |
| g + f | Access project files |
| i | Creating new issue |
| g + b | Access issue boards list |
| (When you’ve opened an issue) e | Edit issue description |
| a | Edit assignees |
| l | Change labels |
Using your GitLab to-do list
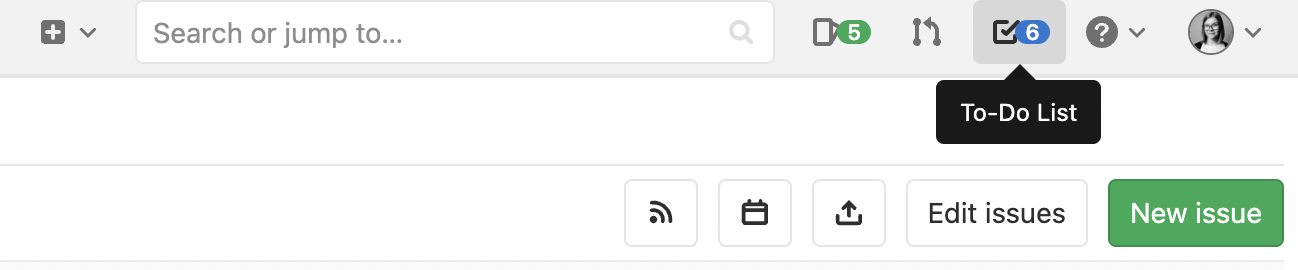
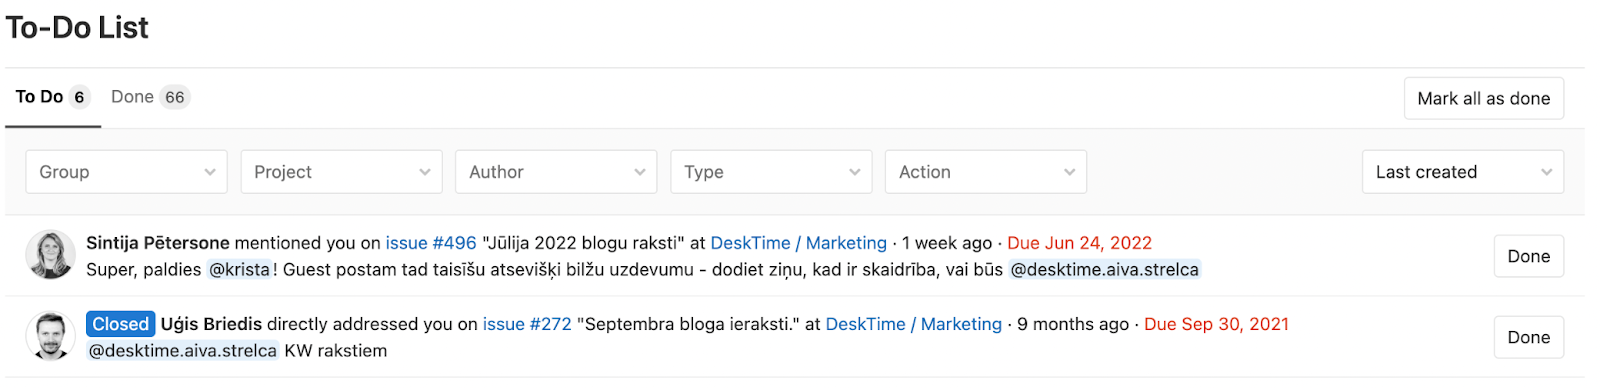
Another beneficial GitLab best practice is using your personal to-do list, which contains all of the items waiting for your input, listed chronologically. To access it, click the checkbox icon on the top right corner.
Now you’re redirected to your personal GitLab to-do list, where you can check out tasks as they’re sorted in To do and Done sections. You can search the list using several filters, such as issue author, action type, project, and more. You can also mark items as done.
Bonus GitLab tip: Integrate with DeskTime
Last, but not least on our beginner Gitlab tips and tricks list is integrating GitLab with the DeskTime time tracker. The integration helps you track and complete your work with added efficiency.
Connecting GitLab with DeskTime is quick and easy:
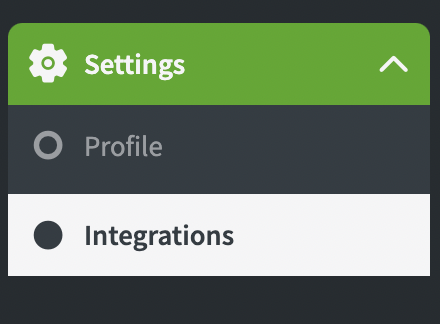
- Open your DeskTime account, on the left side menu, find Settings, click it, then select Integrations
- Find GitLab integration among the options that appear and hit the green Activate button
- When a pop-up window appears, add the needed details – paste your GitLab account’s base URL and the access token you can create in GitLab profile settings
- Hit Save
Note: To track your GitLab project time with DeskTime, make sure you’ve marked your projects and tasks as public.
Now go and give GitLab a go – with these beginner tips and tricks, the tool will be as easy to use as possible!
Did you find this article useful? Give it a clap!
Psst! You can clap more than once if you really loved it 🙂